How to Make SVG Files for Cricut: The Complete Beginner's Guide
If you own a Cricut machine — whether it's an Explore, Maker, or Joy — you already know that SVG files are the gold standard for cutting projects. SVG files produce cleaner cuts, sharper details, and more professional results than raster images like PNG or JPG. But here's the challenge many Cricut users face: finding high-quality SVG files that match their exact creative vision can be frustrating and expensive. The solution? Learn how to create SVG files for Cricut for Cricut yourself. Whether you want to convert a hand-drawn sketch, a family photo, or a logo into a cut-ready design, this guide walks you through every method — from beginner-friendly approaches to professional vector tracing techniques.
Why SVG Is the Best Format for Cricut Projects
Cricut Design Space supports several file formats, but SVG files consistently produce the best cutting results. Here's why every serious Cricut crafter should understand how to make SVG files for Cricut:
- Perfect cut lines — SVG files store artwork as mathematical paths, not pixels. Cricut machines read these paths directly, resulting in smooth, precise cuts with no jagged edges or pixelation artifacts that plague raster-based uploads.
- Layer preservation — When you upload an SVG to Design Space, each element and color layer is preserved as a separate cut layer. This means you can assign different materials, colors, and cut settings to each part of your design without any manual separation work.
- Infinite scalability — Unlike PNG or JPG files, SVGs can be scaled to any size without quality loss. Your design looks just as sharp on a tiny Cricut Joy label as it does on a full 12×24 inch Maker mat.
- Small file size — SVG files are typically much smaller than high-resolution PNG files, making them easier to store, share, and upload. A complex design might be 50KB as an SVG but 5MB as a 300 DPI PNG.
- Editable in Design Space — SVG layers remain individually editable after upload, so you can resize, recolor, and reposition elements without starting over.
If you plan to sell digital products on platforms like Etsy or Creative Fabrica, knowing how to make SVG files for Cricut is also a valuable income skill. Buyers specifically search for Cricut-compatible SVG files, and the market for cut-ready designs continues to grow.
Convert Your Images to SVG Today
Download Super Vectorizer Pro — free trial to preview results. Mac & Windows.
Compatible with macOS 10.10+ (M1/M2/M3) & Windows 7/8/10/11
3 Ways to Make SVG Files for Cricut
There are three main approaches to creating SVG files for Cricut, ranging from completely free (but time-consuming) to paid (but fast and professional). Here's how each method works:
Method 1: Convert an Existing Image to SVG (Easiest)
This is the most common scenario: you have a JPG, PNG, or scanned drawing, and you want to turn it into a Cricut-cuttable SVG. The process is called vector tracing or vectorization. You'll need a tool that can trace the edges and colors in your raster image and convert them into vector paths.
- Choose your source image — Pick a high-contrast image with clear edges. Photos with soft gradients or busy backgrounds are harder to trace cleanly. Logos, silhouettes, and hand-drawn line art work best.
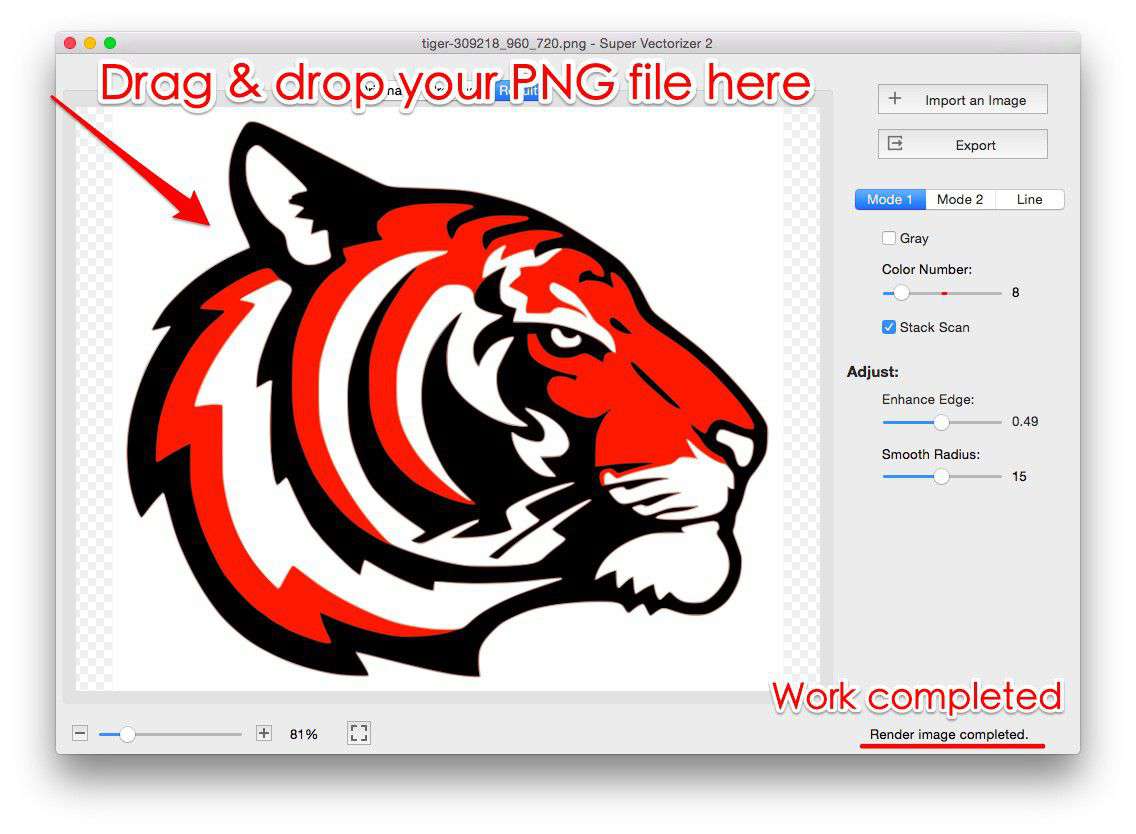
- Open in a vector tracing tool — Use Super Vectorizer Pro (desktop) or an online vectorizer. Drag your image into the app and select the appropriate tracing mode: Edge mode for outlines and silhouettes, Color mode for multi-colored designs, or Grayscale mode for black-and-white artwork.
- Adjust tracing settings — Fine-tune the result by adjusting the number of colors, path smoothing, and noise reduction. Fewer colors generally produce cleaner cuts. Use the split-pane preview to compare your original image with the vector output.
- Simplify and clean up — Remove unnecessary tiny paths, fill gaps in outlines, and make sure all cut lines are continuous. A well-cleaned SVG cuts faster and produces fewer errors on your Cricut machine.
- Export as SVG — Save the file as SVG (Plain) for maximum Cricut Design Space compatibility. Avoid SVGZ (compressed SVG) as Design Space may not recognize this format.
Method 2: Design from Scratch in a Vector Editor
If you have design skills, creating SVG files from scratch gives you the most control. Tools like Adobe Illustrator, Inkscape (free), or Affinity Designer let you draw vector shapes, add text, and combine elements into original Cricut designs.
When designing from scratch for Cricut, keep these rules in mind:
- Use solid fills, not gradients — Cricut machines cut along outlines. Complex gradients get lost or misinterpreted. Use flat colors organized into separate layers.
- Convert text to outlines — Before saving your SVG, convert all text to paths (Type > Create Outlines). This ensures your design appears correctly regardless of which fonts are installed on the computer opening the file.
- Keep strokes as strokes — Cricut Design Space can interpret simple strokes as cut lines. Avoid expanding strokes into filled shapes unless you specifically need that effect.
- Size for your mat — Design at real dimensions. Cricut Explore and Maker have a maximum cut area of 11.5×11.5 inches (12×12 mats) or 11.5×23.5 inches (12×24 mats). Cricut Joy has a maximum width of 4.5 inches.
- Organize by color/material — Group elements that will be cut from the same material onto the same layer. Each layer in your SVG becomes a separate mat operation in Design Space.
Method 3: Use Cricut Design Space's Built-in Upload Tool
Cricut Design Space includes a basic image upload and trace feature. It's the simplest option and doesn't require any external software, but it has significant limitations:
- Basic trace only — Design Space's tracing is rudimentary. It works okay for simple silhouettes but struggles with anything detailed or multi-colored.
- No path editing — You can't edit individual vector nodes, smooth curves, or clean up messy paths within Design Space. What you get from the automatic trace is what you're stuck with.
- Manual background removal — You must manually click areas to remove the background. This works for simple images but becomes tedious and imprecise with complex designs.
- No batch processing — You can only process one image at a time, making this method impractical for creating multiple SVG files.
For quick, simple projects, Design Space's upload tool gets the job done. But if you want professional-quality SVG files for Cricut — especially if you're selling designs or cutting intricate patterns — a dedicated vector conversion tool like Super Vectorizer Pro delivers far superior results.
Step-by-Step: Convert Any Image to a Cricut-Ready SVG
Let's walk through a real example: converting a hand-drawn logo sketch into a clean SVG file that's ready for your Cricut machine. This method works for photos, clip art, scanned drawings, and digital artwork.
- Prepare your image — Scan or photograph your drawing at the highest resolution possible. 300 DPI minimum. If using a phone photo, make sure it's well-lit and taken straight-on to avoid perspective distortion. Crop to the area you want to convert.
- Open in Super Vectorizer Pro — Launch the app and drag your image file into the window. Supported input formats include PNG, JPG, BMP, TIFF, and PDF. The app automatically analyzes your image and suggests the best tracing mode.
- Select tracing mode — For line art and logos, choose "Edge" mode. For colored illustrations, choose "Color" mode with 2-6 colors depending on how many vinyl/material colors you'll use. For black-and-white designs, "Grayscale" or "Black & White" mode works best.
- Adjust detail level — Use the smoothing slider to reduce unnecessary nodes. Too many nodes create jagged cuts; too few lose detail. Aim for smooth curves that preserve the essential shape of your design. The live preview updates instantly.
- Export as SVG — Click Export, choose SVG as the format, and save the file. The resulting SVG is immediately ready for upload to Cricut Design Space.
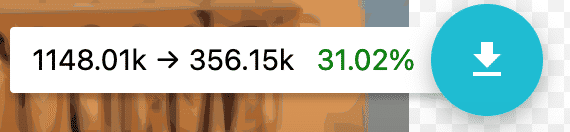
After creating your SVG, we recommend running it through the SVG compressor online to strip extra metadata and optimize the file. A lean SVG uploads faster to Design Space and processes more quickly on your Cricut.
Cricut SVG Tips and Best Practices
After helping thousands of Cricut users create better SVG files, we've compiled these essential tips for reliable, frustration-free cutting:
- Test with cardstock first — Before cutting expensive vinyl or specialty materials, do a test cut on plain cardstock. This catches sizing issues, alignment problems, and overly intricate details that might tear during cutting.
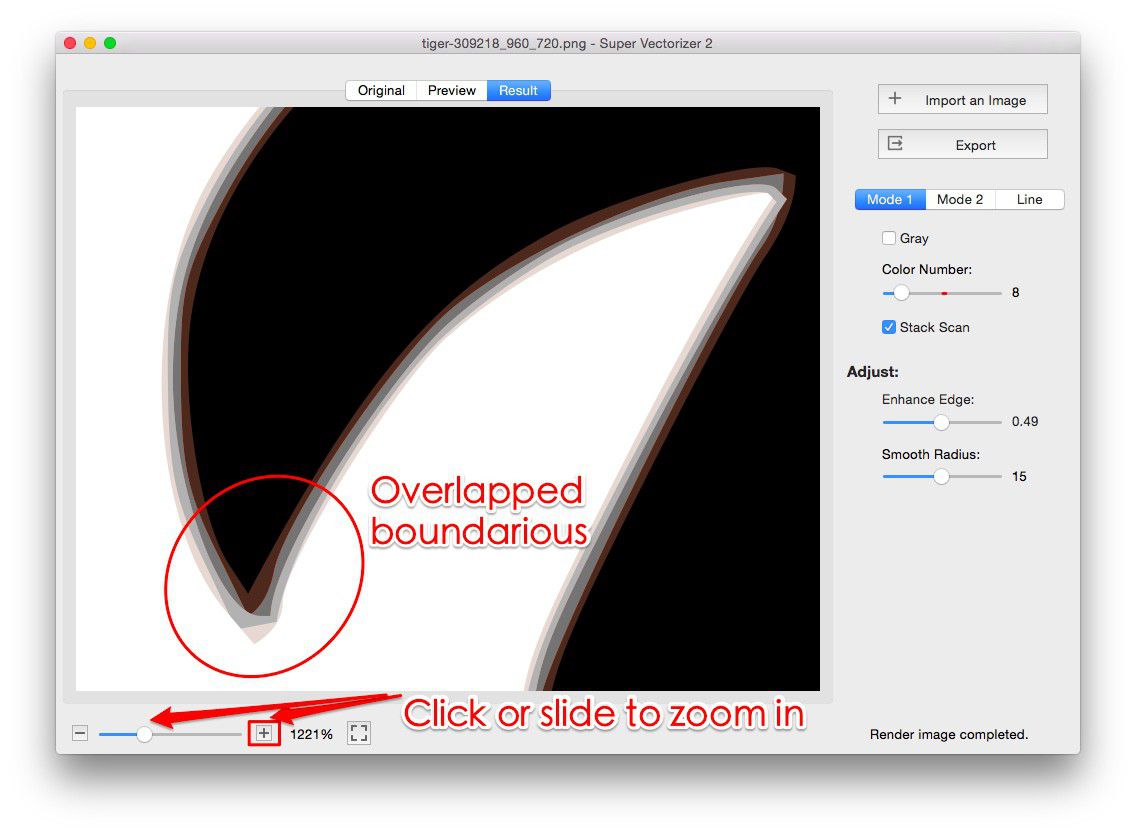
- Weld overlapping shapes — If your SVG has overlapping cut lines (two shapes that share an edge), use the Weld tool in Design Space to merge them. Unwelded overlapping lines can cause your Cricut to cut the same path twice, wasting time and potentially damaging the material.
- Attach text layers — If your design includes text alongside other elements, use the Attach tool to lock their relative positions. Without Attach, Design Space may rearrange your elements to optimize material usage — great for saving vinyl, but not what you want when placement matters.
- Check for open paths — Open paths (lines that don't form a closed shape) sometimes cut unexpectedly in Design Space. In your vector editor, verify that all cut lines are closed paths before saving. If a path is meant to be open (a decorative line, for example), leave it as a stroke rather than converting it to a filled path.
- Keep designs reasonably simple — Your Cricut blade has physical limitations. Extremely fine details (less than 1mm) may not cut cleanly, especially on thicker materials like faux leather or chipboard. When in doubt, simplify.
Frequently Asked Questions
Can I use any SVG file with my Cricut?
Most standard SVG files work in Cricut Design Space, but there are a few requirements: the SVG must use RGB colors (not CMYK), text must be converted to outlines, and the file should be under the size limits for Design Space uploads (which are generous — most SVGs are well within range). Additionally, Cricut Design Space does not support SVG filters, animations, or embedded JavaScript — it only reads the basic vector path and color data. If your SVG originated from a web design tool, strip any interactive elements before uploading.
Do I need to pay for software to make SVG files for Cricut?
No, there are free options available. Inkscape is a capable free vector editor, and Cricut Design Space has a built-in upload tool. However, free tools often require more manual effort and produce less consistent results — especially when converting raster images to SVG. Paid tools like Super Vectorizer Pro automate the vectorization process with more intelligent tracing algorithms, saving hours of manual path cleanup. If you're making SVG files regularly, a one-time purchase of a good vector conversion tool pays for itself within the first few projects.
What's the difference between an SVG I buy on Etsy and one I make myself?
The main difference is licensing and customization. Purchased SVGs come with a license that may restrict commercial use or require attribution. Making your own SVG files gives you full ownership and creative control — you can design exactly what you envision instead of settling for a close-enough design. Self-made SVGs are also more satisfying and can become a revenue stream if you sell your designs. The quality difference depends entirely on your tools and skills: with a good vector conversion tool, your self-made SVGs can be indistinguishable from professional designs.
Why does my SVG look different in Design Space than in my editor?
This is a common frustration and usually comes down to unsupported SVG features. Design Space strips out gradients, drop shadows, clipping masks, and pattern fills. It also doesn't support SVG fonts (text must be outlines) or CSS styling embedded in the SVG. To preview what your design will look like in Design Space, temporarily remove all effects and styling from your SVG before exporting. If the design relies on visual effects to look good, simplify it or reconsider whether your material choices can achieve the same result. When in doubt, run a test cut.
Start Making Cricut-Ready SVG Files Today
Download Super Vectorizer Pro — free trial. Convert any image to clean, cut-ready SVG in seconds. Mac & Windows.
Compatible with macOS 10.10+ (M1/M2/M3) & Windows 7/8/10/11
Learning how to make SVG files for Cricut opens up a world of creative possibilities. You're no longer limited to the designs other people have created — you can bring your own drawings, photos, and ideas to life with your cutting machine. Whether you use the free Cricut Design Space upload tool for quick projects or invest in a dedicated vector conversion app like Super Vectorizer Pro for professional-quality results, the key is to start practicing. Begin with simple shapes, test your cuts, and gradually build up to more complex designs. Before long, you'll be the one other crafters come to for SVG tips — and you might even build a side business selling your original Cricut designs. For more resources, check out our free online SVG tools to optimize and prepare your files for flawless cutting.