SVG for Laser Cutting — A Complete Guide to Laser-Ready Vector Files
You've just received a Glowforge, xTool, or Ortur laser cutter, and you're excited to start making custom signs, engraved gifts, and precision-cut designs. You open a JPEG or PNG file that looked perfect on screen, feed it into your laser software, and the result is a disaster — blurred edges, double lines, or the laser treating every pixel as its own cut path. Laser cutters don't speak pixels. They speak vectors. Specifically, they speak SVG for laser cutting — a format that defines shapes as clean mathematical paths rather than grids of colored squares. In this guide, you'll learn exactly how to source, create, and prepare SVG files that produce flawless laser cutting and engraving results.
Why Laser Cutters Demand Vector Files — Not Raster Images
A laser cutter's control software (LightBurn, LaserGRBL, or the manufacturer's proprietary app) translates your design into motion commands: move the laser head from coordinate (x1, y1) to (x2, y2) at a specific speed and power level, following the outline of your design. This is fundamentally a vector operation — it requires a continuous path definition, not a grid of pixels. When you feed a PNG or JPEG into laser software, the software attempts to trace edges automatically, which nearly always produces jagged, imprecise results.
SVG files solve this problem because they store every line, curve, and shape as mathematical path data. The laser knows exactly where to move, at what speed, and with what power — producing clean cuts and crisp engravings every time. Using svg for image vectorizer for laser cutting also gives you precise control over stroke color, thickness, and fill, which directly map to laser speed, power, and operation mode in most software.
Convert Your Images to SVG Today
Download Super Vectorizer Pro — free trial to preview results. Mac & Windows.
Compatible with macOS 10.10+ (M1/M2/M3) & Windows 7/8/10/11
Where to Get SVG Files for Laser Cutting
You have four main options for sourcing SVG files suitable for laser cutting:
1. Download Ready-Made SVG Files
Marketplaces like Etsy, Design Bundles, and Creative Fabrica offer thousands of laser-ready SVG designs — from mandala ornaments to box templates and signage layouts. Quality varies significantly. Look for files specifically tagged "laser ready" or "laser cutting SVG." These typically come with properly configured stroke widths and separated layers for different operations. Expect to pay $2-$15 for a pack of designs.
2. Create SVGs from Scratch
Vector design software like Adobe Illustrator, Inkscape (free), or Affinity Designer lets you draw laser-ready SVGs from a blank canvas. This approach gives you complete creative control and ensures 100% clean path data. The learning curve is steeper, but for custom projects — personalized gifts, branded signage, or unique product designs — it's the only way to get exactly what you envision.
3. Convert Raster Images to SVG for Laser Cutting
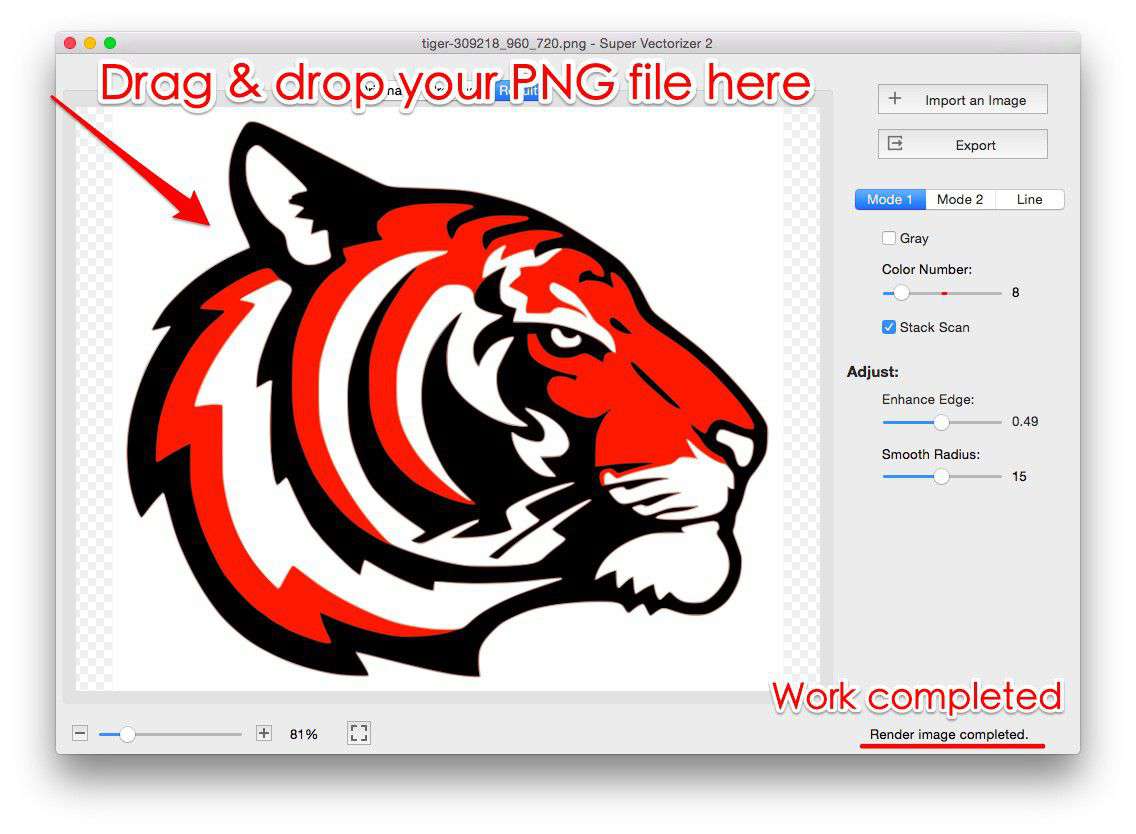
This is the most common scenario. You have a logo, illustration, or photograph in PNG, JPEG, or BMP format and need it as a laser-cuttable SVG. This requires vectorization — the process of tracing edges in the raster image and converting them to vector paths. Super Vectorizer Pro handles this automatically, and we'll cover the full workflow in the step-by-step section below.
4. Use CAD Software for Precision Parts
For mechanical parts, enclosures, and assemblies that require exact millimeter dimensions, CAD tools like Fusion 360, Onshape, or FreeCAD offer parametric modeling and then export to SVG or DXF. This is overkill for decorative laser cutting but essential for functional parts.
Convert a PNG or Photo to Laser-Ready SVG
Super Vectorizer Pro turns PNG, JPG, and BMP into clean SVG vector paths on Mac & Windows. Free trial available.
Compatible with macOS 10.10+ (M1/M2/M3) & Windows 7/8/10/11
How to Prepare SVG for Laser Cutting: The Critical Settings
Not every SVG file is laser-ready out of the box. Here are the essential checks and adjustments you must make before hitting "send" on your laser cutter:
Stroke Width: The Hairline Rule
Laser cutting software interprets stroke width as the cut path. A stroke that's 5 mm thick in your design software will be treated as a 5 mm-wide area to engrave — not a 5 mm cut line. For cutting operations, set all cut paths to hairline width (0.001 mm or 0.01 mm). In LightBurn, any stroke thinner than 0.02 mm is automatically treated as a cut line. This is the single most common mistake beginners make — they leave default stroke widths from their design software and wonder why the laser engraves instead of cuts.
Color Coding for Operations
Most laser software uses color to assign different settings. A typical setup:
- Red (RGB 255,0,0): Cut — full-power line following
- Black (RGB 0,0,0): Engrave — raster fill operation
- Blue (RGB 0,0,255): Score — low-power marking line
- Green (RGB 0,255,0): Second pass or different power level
Organize your SVG layers by operation type and assign stroke colors accordingly. This makes batch processing much faster — you configure the power/speed for each color once, and every shape with that color automatically inherits the settings.
Remove Overlapping Paths
An svg for laser cutting with overlapping or duplicate paths will cause the laser to trace the same line twice — doubling the cut time, overheating the material, and potentially creating burn marks. Before exporting, select all paths and run a "remove duplicates" or "simplify path" operation. In Inkscape: Path → Simplify. In Illustrator: Object → Path → Simplify.
Close Open Paths
An open path — a line where the start and end points don't connect — can confuse laser software into treating it as an engraving stroke rather than a cut. Check that all cut-out shapes form closed loops. Most vector editors have a "join nodes" or "close path" command.
Set the Correct Canvas Size
Your SVG's viewBox dimensions should match your material size. If your laser bed is 400 × 400 mm, set the SVG viewBox to viewBox="0 0 400 400" and design within those bounds. This prevents scaling surprises when you import the file into laser software.
Step-by-Step: Convert a PNG Logo to Laser-Ready SVG
This workflow takes a raster logo (PNG/JPEG) and produces a clean SVG file ready for cutting or engraving:
- Open your raster image in Super Vectorizer Pro — Download and launch Super Vectorizer Pro for Mac or Windows. Drag your PNG or JPEG into the workspace.
- Choose the vectorization mode — For logos and text, select "Silhouette" or "Edge Detection" mode. For photographs intended for engraving, use "Grayscale" mode. The preview updates in real time so you can compare modes before committing.
- Adjust threshold and smoothness — Lower thresholds capture more detail (good for engraving); higher thresholds produce cleaner cut lines (good for cutting). Set smoothness to medium — too much smoothness rounds off sharp corners, too little leaves jagged edges.
- Export as SVG — Choose SVG as the output format. Before saving, verify that the stroke width is set to 0.01 mm for cut paths, and that colors match your laser software's operation mapping (red = cut, black = engrave).
- Import into laser software — Open LightBurn, LaserGRBL, or your machine's software. Import the SVG. Verify that the software correctly interprets stroke colors as the intended operations. Run a test on scrap material before committing to your final piece.
Common Laser Cutting SVG Problems and How to Fix Them
| Problem | Cause | Fix |
|---|---|---|
| Laser engraves instead of cuts | Stroke width too thick | Set stroke to 0.01 mm or hairline |
| Double lines / cuts twice | Duplicate or overlapping paths | Run "Simplify" and "Remove Duplicates" |
| Jagged or stair-step edges | Raster image used directly (not vectorized) | Vectorize the image to SVG first |
| Design too large/small on import | SVG viewBox doesn't match material size | Set viewBox to match bed dimensions |
| Missing parts of the design | Paths outside viewBox; unclosed paths | Fit all art within viewBox; close all paths |
| Burn marks on material | Too many unnecessary anchor points | Simplify paths to reduce node count |
SVG Settings for Popular Laser Cutters
Different laser cutter brands have slightly different expectations for SVG input. Here's a quick reference:
Glowforge
Glowforge accepts SVG files directly and automatically maps stroke colors to operations. Red strokes = cut, black fills = engrave, blue strokes = score. The Glowforge web interface handles import, so the SVG must be well-formed XML with no external CSS references. Embed all styles inline. Glowforge also supports PNG/JPG for engraving, but SVG produces sharper results for cutting.
xTool D1 / M1 / P2
xTool's XCS software imports SVG files and assigns operations based on layer organization rather than stroke color alone. Each layer in your SVG becomes a separate processing object in XCS. Organize your design into named layers (e.g., "Cut", "Engrave", "Score") for the smoothest import experience. xTool also supports DXF as an alternative vector format.
LightBurn (Universal)
LightBurn is the most widely used third-party laser control software, supporting Ruida, Trocen, and GRBL controllers. It imports SVG files with full layer and color preservation. LightBurn's "Optimization Settings" let you control cut order, start points, and path direction — features that rely on clean vector data. Garbage in, garbage out: a messy SVG with thousands of tiny segments will cut slowly and with poor quality.
Ortur / LaserGRBL
LaserGRBL (for GRBL-based lasers including Ortur models) imports SVG files with basic color-to-operation mapping. It's less forgiving than LightBurn — make sure your SVG uses simple, well-formed paths with no gradients, no embedded raster images, and no external CSS.
Optimizing SVG Complexity for Laser Performance
A laser cutter's motion system has physical limits. Every anchor point in your SVG path becomes a velocity change point for the laser head. A design with 10,000 anchor points will cut much slower — and with worse edge quality — than one with 1,000 anchor points, even if they look identical on screen. After vectorizing your image, always check the path node count and reduce it where possible. Super Vectorizer Pro automatically balances detail retention with path simplicity, but you can further reduce nodes in Inkscape (Path → Simplify, or Ctrl+L).
For engraving SVGs, be mindful of the fill pattern. Solid fill shapes engrave as raster passes, which are much slower than vector operations. If speed matters, consider converting engraving areas to hatch pattern fills — this reduces laser time from potentially hours to minutes on large pieces.
Frequently Asked Questions
Can I use any SVG file for laser cutting?
Technically yes, but not every SVG will produce good results. An SVG designed for web display might use CSS gradients, embedded images, and fonts that laser software can't interpret. A proper svg for laser cutting uses simple paths with hairline strokes for cuts, solid fills for engraving, and no external dependencies. Always preview your SVG in laser software and run a test cut on scrap material before committing to your final piece.
What's better for laser cutting — SVG or DXF?
Both work well, but SVG has advantages for decorative and artistic designs: it supports colors for operation mapping, curved paths (bezier curves), and layer organization. DXF is better for mechanical parts because it handles precise dimensioning, arcs, and toolpath generation natively. For most hobbyist and craft laser cutting, SVG is the more versatile format. If your project combines engraving and cutting in one file, SVG is the clear winner.
How do I convert a hand-drawn sketch to SVG for laser cutting?
Scan or photograph your sketch at high resolution (300 DPI minimum), then use a vectorization tool to auto-trace the lines into SVG paths. Super Vectorizer Pro on Mac or the best PNG to SVG converters can convert the scanned image to clean vector art. After conversion, check for stray paths, simplify nodes, and assign stroke colors for your laser's operation mapping. Hand-drawn sketches typically require more cleanup than digital designs — budget 10-15 minutes for manual path correction.
Why does my SVG look perfect on screen but cuts poorly?
This is almost always due to one of three issues: (1) the stroke width is too thick, causing the laser to treat a cut line as an engraving area; (2) there are overlapping or duplicate paths that cause the laser to cut the same line multiple times; or (3) the SVG contains invisible construction paths or artifact layers that become visible to the laser software. Open your SVG in a text editor and search for stroke-width values — anything above 0.1 mm should be reduced to hairline for cutting paths. Then check for duplicate <path> elements with identical or nearly identical d attributes.
Convert Any Image to Laser-Ready SVG
Super Vectorizer Pro turns PNG, JPG, and BMP into clean SVG vectors ready for laser cutting. Free trial available.
Compatible with macOS 10.10+ (M1/M2/M3) & Windows 7/8/10/11
Using svg for laser cutting is the difference between a clean, professional result and a disappointing, burnt mess. The format is tailor-made for the task — it defines paths that lasers can follow with precision, supports color-based operation mapping, and scales to any bed size without pixelation. The key is starting with well-structured SVG files: hairline strokes for cutting, solid black fills for engraving, no overlapping paths, and properly sized viewBoxes. Whether you're downloading ready-made designs, drawing from scratch in Inkscape, or converting raster images with Super Vectorizer Pro, investing 10 minutes in SVG preparation before you load material into your laser will save you hours of wasted material and frustration.