
Inkscape is the world's most popular free and open-source vector graphics editor — and it's also one of the best tools for converting PNG (or JPG, BMP, and other raster formats) to SVG. Using Inkscape's Trace Bitmap feature, you can automatically trace the outlines and shapes in a raster image and convert them into scalable vector paths.
In this comprehensive guide, we'll walk you through the entire process step by step. You'll learn the best Trace Bitmap settings for different types of images (logos, photos, line art), how to clean up the results, and when Inkscape is the right choice vs. when you should use dedicated vectorization software like Super Vectorizer Pro.
Want better auto-tracing results? Try Super Vectorizer Pro free trial to preview advanced vectorization quality.
Compatible with macOS 10.10+ (M1/M2/M3) & Windows 7/8/10/11
Our Verdict
Inkscape's Trace Bitmap works for basic conversion, but for production-quality vectorization, a dedicated tool saves significant cleanup time.
Best for Quality: Super Vectorizer Pro
- Superior auto-trace with color separation
- Less manual cleanup needed
- Free trial to preview results
- Mac and Windows native apps
Best Free: Inkscape Trace Bitmap
- Free and open source
- Multi-step trace for complex images
- Manual Bezier cleanup available
- Requires more time and skill
What is Trace Bitmap in Inkscape?
Before diving into the steps, let's understand what "Trace Bitmap" actually does. When you open a PNG file in Inkscape, it's just a raster image — a grid of pixels. Trace Bitmap is Inkscape's auto-tracing feature that analyzes the pixel data and creates vector paths (mathematical curves and lines) that approximate the original image.
The result is an SVG file with actual vector paths that can be scaled infinitely without losing quality. This is essential for logos, illustrations, and any graphic that needs to be used at different sizes.
Step-by-Step: Convert PNG to SVG in Inkscape
Step 1: Download and Install Inkscape
Inkscape is completely free and open-source. Download it from inkscape.org (Windows, Mac, and Linux are all supported). Install it like any regular application.
Step 2: Open Your PNG Image
Launch Inkscape and go to File → Open (or drag and drop your PNG file into the Inkscape window). Your image will appear on the canvas. For best results, make sure your PNG has good contrast and a relatively simple composition.
Step 3: Select the Image
Click on your PNG image to select it. You'll know it's selected when you see the selection box with handles around the image. This step is crucial — Trace Bitmap only works when an image is selected.
Step 4: Open the Trace Bitmap Dialog
There are two ways to open Trace Bitmap:
- Method A: Go to
Path → Trace Bitmapin the top menu - Method B: Press
Shift+Alt+B(Windows/Linux) orShift+Option+B(Mac)
The Trace Bitmap dialog will open as a panel on the right side of the window.
Step 5: Choose the Right Tracing Mode
This is the most important step. Inkscape offers several tracing modes, and choosing the right one makes a huge difference:
| Tracing Mode | Best For | Result |
|---|---|---|
| Brightness Cutoff | Black & white line art, silhouettes | Single color vector |
| Edge Detection | Technical drawings, CAD | Outlines only |
| Color Quantization | Logos with limited colors (2-8 colors) | Multi-color vector Recommended |
| Adaptive Quantization | Complex images with many colors | Multi-color, adaptive |
| Pixel Art (experimental) | Pixel art, game sprites | Clean pixel vector |
For most logos and simple graphics: Use Color Quantization with 4-8 colors.
For black & white line art: Use Brightness Cutoff.
For photos: Inkscape isn't ideal — consider Super Vectorizer Pro or online tools instead.
Step 6: Adjust the Settings
Each tracing mode has specific settings. Here are the key ones to adjust:
For Color Quantization:
- Number of colors: Start with 4-8. More colors = more detail but larger file size.
- Color precision: Leave at 2 (default) unless you need finer control.
- Corner rounding: 0-1 for sharp corners, higher for smoother curves.
For Brightness Cutoff:
- Threshold: 0.4-0.6 for most images. Higher = more white areas become transparent.
Step 7: Click "OK" and Wait
Click the OK button in the Trace Bitmap dialog. Inkscape will process the image — this can take anywhere from a few seconds to a few minutes depending on image complexity and your computer's speed. You'll see a progress bar at the bottom of the window.
Step 8: Review the Result
Once tracing is complete, a new vector object will appear on top of your original PNG. The original PNG is still there underneath — click and drag the vector result to the side to compare. If you're happy with the result, proceed to the next step. If not, undo (Ctrl+Z) and adjust the settings.
Step 9: Delete the Original PNG
Select the original PNG image (underneath the vector result) and press Delete. You now have a clean SVG vector.
Step 10: Clean Up the Vector (Important!)
Inkscape's Trace Bitmap often creates messy paths with too many nodes. To clean up:
- Select the vector result
- Go to
Path → Simplify(or pressCtrl+L) - Repeat Simplify 2-3 times to reduce node count without losing visible detail
Step 11: Save as SVG
Go to File → Save As and choose Plain SVG (*.svg) as the file format. "Plain SVG" is more compatible with other software than Inkscape's default SVG format. Click Save and you're done!
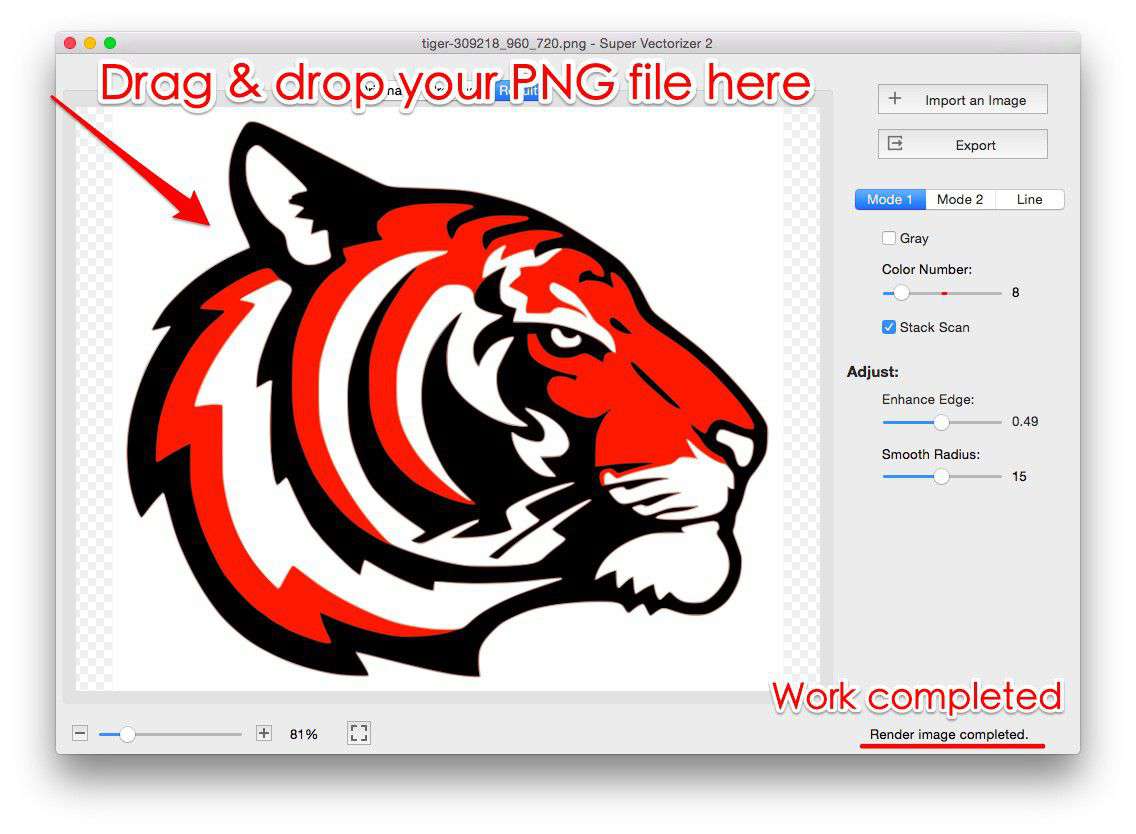
Best Trace Bitmap Settings for Different Image Types
For Logos (Best Results)
Logos are ideal for Inkscape tracing because they typically have flat colors, clear edges, and limited color palettes.
- Mode: Color Quantization
- Number of colors: Match the actual colors in the logo (usually 2-5)
- Corner rounding: 0 (keep sharp edges)
- Post-processing: Simplify once, then manually adjust any problem areas with the Node tool
For Line Art / Sketches
Line art (black lines on white background) traces beautifully in Inkscape.
- Mode: Brightness Cutoff
- Threshold: 0.5 (adjust based on image contrast)
- Post-processing: Simplify 2-3 times to smooth the lines
For Photos (Not Recommended)
Inkscape struggles with photos because they have continuous tones, gradients, and complex detail. The traced result often looks like a posterized mess. For photos, use Super Vectorizer Pro (for desktop) or specialized online tools instead.
Inkscape vs Super Vectorizer Pro: Which Should You Use?
Inkscape Advantages
- 100% free and open-source
- Works on Windows, Mac, Linux
- Full vector editor (not just converter)
- Trace Bitmap is customizable
- Active community and tutorials
Super Vectorizer Pro Advantages
- Better tracing algorithm (cleaner results)
- Faster processing (optimized C++ engine)
- Per-image parameter control built in
- Multiple vectorization algorithms to choose from
- Free trial to preview results before buying
Bottom line: Use Inkscape if you want a free solution and don't mind spending time tweaking settings. Use Super Vectorizer Pro if you need professional-quality results quickly, especially for complex images.
Common Inkscape PNG to SVG Problems & Fixes
Problem: Result Has Too Many Nodes (File is Huge)
Fix: Use Path → Simplify (Ctrl+L) repeatedly. Each application reduces node count. You can also manually delete unnecessary nodes with the Node tool (N).
Problem: Colors Look Wrong
Fix: Increase "Number of colors" in the Trace Bitmap settings. If the original PNG has many colors, you need to match that in the tracing settings. Alternatively, the PNG might have transparency issues — open it in an image editor first and add a white background.
Problem: Tracing Takes Forever
Fix: Reduce the image size before tracing. Inkscape processes pixels, so a 4000×4000 PNG will take much longer than a 1000×1000 version. Resize in Image → Image Properties before tracing.
Problem: Result is All One Color (No Detail)
Fix: You're likely using "Brightness Cutoff" on a color image. Switch to "Color Quantization" or "Adaptive Quantization" for color images.
Frequently Asked Questions
Is Inkscape really completely free?
Yes! Inkscape is open-source software released under the GPL license. It's completely free to download, use, and even modify. There are no premium tiers, no watermarks, and no usage limits. The trade-off is that the interface can be a bit clunky, and some features (like PDF export) require additional software (Ghostscript) to be installed separately.
Can Inkscape convert JPG to SVG too?
Absolutely. The process is exactly the same for JPG, BMP, GIF, and most other raster formats — Inkscape's Trace Bitmap works on any raster image. The quality of the result depends on the image content (logos and line art work best), not the file format. Just open your JPG, select it, and follow the same Trace Bitmap steps described in this guide.
Why does my SVG look pixelated after saving from Inkscape?
This usually happens for one of two reasons: (1) You didn't actually trace the bitmap — the PNG is still embedded in the SVG. Make sure you delete the original PNG after tracing. (2) You're viewing the SVG in a browser that's rendering it at low resolution (zoom in to check). Right-click the SVG and "Open image in new tab" to see the actual vector quality.
Can I batch convert multiple PNGs to SVG in Inkscape?
Inkscape doesn't have a built-in batch Trace Bitmap feature in the GUI. However, you can use the command-line interface: inkscape --export-type=svg --export-area-drawing input.png. For easier batch processing, consider an Inkscape command-line script or a dedicated batch converter. You can also use extensions like "Inkscape Batch Export" from the Inkscape extensions repository.
What's the best alternative to Inkscape for PNG to SVG conversion?
The best alternatives depend on your needs: (1) Super Vectorizer Pro — Best overall quality and speed, Mac & Windows, paid but has free trial to preview results. (2) Adobe Illustrator — Industry standard, excellent Image Trace feature, but expensive subscription. (3) Online converters (like the ones on svgvector.com) — Convenient for quick one-off conversions, no installation needed. (4) Vector Magic — Specialized desktop and online tool, very good results, paid.
Want Better Tracing Results?
Super Vectorizer Pro uses advanced vectorization algorithms that produce cleaner, more accurate SVG results than Inkscape's Trace Bitmap. Try the free trial to preview results before committing.
Compatible with macOS 10.10+ (M1/M2/M3) & Windows 7/8/10/11
Related Articles
Try These Free Online Tools
No download required — convert, compress & optimize SVGs right in your browser
PNG to SVG Converter
Convert PNG, JPG, BMP images to scalable vector graphics instantly
PNG to SVG ConverterSVG Compressor (Mini)
Reduce SVG file size by up to 80% without losing quality
SVG Compressor OnlineSVG Optimizer
Clean up SVG code, remove redundant data and optimize for web
SVG Optimizer OnlineJPG to SVG Converter
Turn JPEG photos into crisp vector artwork in seconds
JPG to SVG ConverterEPS to SVG Converter
Convert EPS vector files to web-friendly SVG format
EPS to SVG ConverterAll Free Tools
Browse our complete collection of free online conversion tools
Browse All Free Tools