
If you own a Cricut cutting machine, you already know that SVG files are the gold standard for clean, scalable cuts. Unlike JPG or PNG images, a proper SVG tells Cricut Design Space exactly where to cut, draw, or score. The challenge? Most of the images you find online — logos, clip art, handwritten text — are raster formats that Cricut can't work with directly. That's where a Cricut SVG converter comes in. In this guide, we'll explain what makes an SVG "Cricut-ready," compare the best conversion tools (including Super Vectorizer Pro for desktop and free online alternatives), and walk through the complete workflow from image to cutting mat.
Ready to convert your images for Cricut? Try Super Vectorizer Pro free trial to preview vectorization results.
Compatible with macOS 10.10+ (M1/M2/M3) & Windows 7/8/10/11
Why SVG Is the Best Format for Cricut
Cricut Design Space supports several file types (JPG, PNG, BMP, GIF, SVG), but SVG is the only format that preserves vector paths. When you upload a JPG to Design Space and use the "Simple" or "Complex" cut modes, the software attempts to trace the image — often with jagged edges, missing details, or broken paths. A proper SVG file, by contrast, contains mathematical paths that Cricut follows precisely.
Key advantages of images to SVG for Cricut:
- Scalability without quality loss: SVG paths scale infinitely. Whether you're cutting a 1-inch sticker or a 12-inch banner, the edges stay crisp.
- Layer preservation: A well-made SVG can preserve separate elements (text, shapes, decorative elements) as individual layers in Design Space, giving you full control over colors and materials.
- Small file size: Vector SVGs are typically smaller than high-resolution PNGs, making Design Space uploads faster.
- Clean cut lines: No pixelation means your Cricut blade follows smooth, continuous paths — no micro-jumps that cause tearing or imprecise cuts.
What Makes an SVG "Cricut-Ready"?
Not all SVGs are created equal. A Cricut-ready SVG meets these criteria:
| Criteria | Why It Matters | Cricut-Ready Standard |
|---|---|---|
| Path Continuity | Broken paths cause incomplete cuts | All cut lines are closed, continuous paths |
| Stroke Width | Thick strokes may cut unpredictably | Strokes converted to fills (or <0.5px) |
| Number of Nodes | Too many nodes slow down Design Space | Optimized / simplified paths |
| Embedded Images | Linked images break when sharing | All elements are native SVG paths |
| Color Mode | RGB vs CMYK affects preview | RGB color space |
When you use a Cricut SVG converter, the goal is to produce an SVG that meets all five criteria. Super image vectorizer for Cricut Pro excels at path continuity and node optimization — two areas where free online converters often fall short.
Method 1: Super Vectorizer Pro (Desktop — Best for Regular Cricut Users)
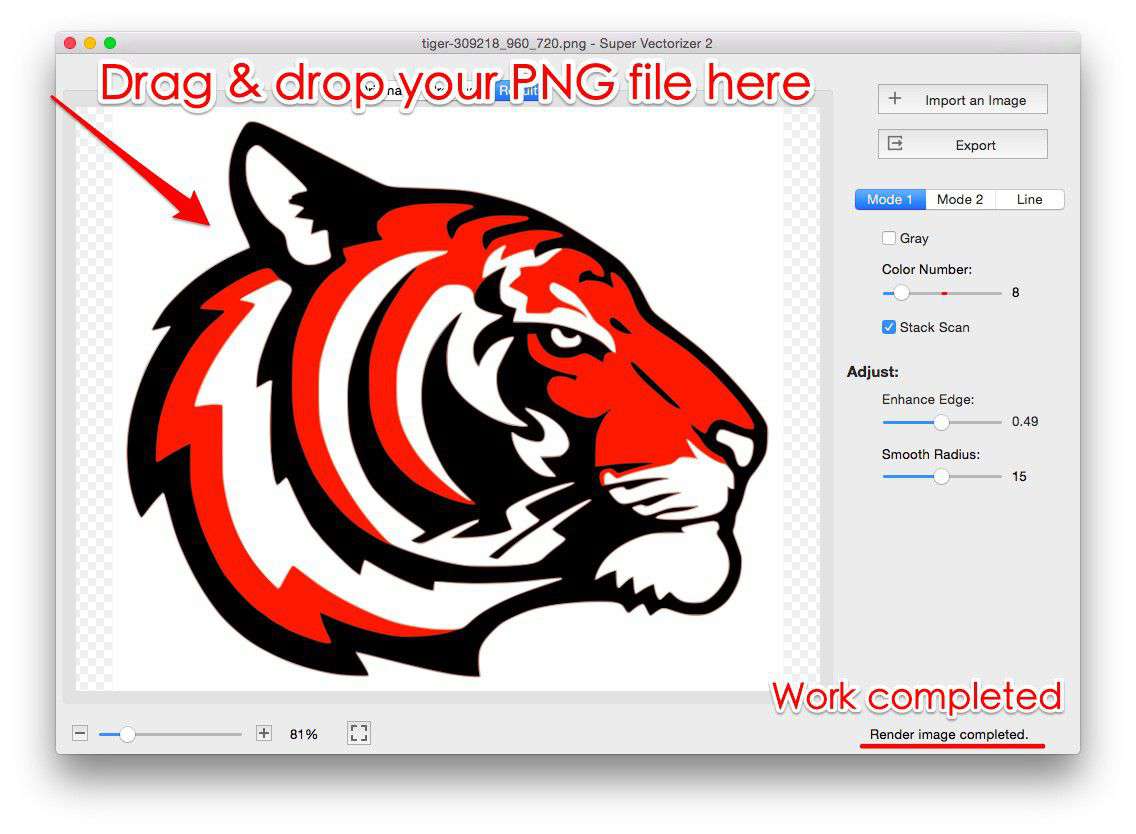
If you create Cricut projects regularly, a desktop app gives you the most control. Super Vectorizer Pro is a Mac and Windows application that converts raster images (PNG, JPG, BMP, GIF, TIFF, WebP) to SVG with precision. Here's the workflow:
Step 1: Prepare Your Source Image
Start with the highest-resolution image you have. For Cricut projects, 300 DPI at your intended cut size is ideal. If you only have a low-res image, vectorization can still help — the SVG output will be sharp even if the source was pixelated.
Step 2: Choose the Right Trace Mode
Super Vectorizer Pro offers multiple trace modes. For Cricut SVGs:
- Line Art / Sketch mode: Best for hand-drawn designs, text-based images, and simple logos with few colors.
- Photo / Full Color mode: Best for multi-color designs, watercolor clip art, or detailed illustrations.
- Black & White mode: Best for silhouette-style designs where you want a single cut layer.
Step 3: Adjust Node Count
This is the most important step for Cricut users. Too many nodes = slow Design Space performance. Super Vectorizer Pro lets you adjust the detail level. For most Cricut projects, aim for a node count that preserves the shape accurately but doesn't create unnecessary micro-curves. The app's preview lets you see the result before finalizing.
Step 4: Export as SVG
Once you're happy with the preview, export the result as an SVG file. Note: the trial version allows you to preview the vectorization result — to export the final SVG file, you'll need the full version. This lets you test thoroughly before committing.
Step 5: Import into Cricut Design Space
Open Cricut Design Space, click "Upload" → "Upload Image" → select your SVG. Design Space will recognize the vector paths and display them cleanly. You can then assign colors, resize, and send to your Cricut cutter.
Desktop App vs Online Converter for Cricut SVGs
Which tool should you use for Cricut SVG conversion? Here's how they compare across the features that matter most to Cricut users.
Super Vectorizer Pro (Desktop)
- Full control over node count and path simplification
- Per-design tuning of trace settings
- Works offline — no file size limits
- Preserves separate elements as distinct paths
- Free trial to preview results before export
Free Online Converters
- No installation required
- Good for one-off, simple conversions
- File size limits (typically 5-10 MB)
- Less control over output quality
- Requires internet connection
Method 2: Free Online Cricut SVG Converters
If you only need to convert an image occasionally, free online tools are a good starting point. SVGVector's free online converter handles PNG, JPG, and WebP images and outputs SVG directly in your browser. Here's when to use an online tool vs. a desktop app:
Use an online converter when:
- You have a simple, high-contrast image (black text on white background)
- You're converting a single image (not batch processing)
- You don't want to install software
- The image is under 5 MB
Use a desktop app (Super Vectorizer Pro) when:
- You're converting multiple images for a single project
- Your image has fine details or gradient colors
- You need to adjust node count for cleaner Cricut cuts
- You want to preserve layer separation for multi-color projects
Common Cricut SVG Problems (and How to Fix Them)
Problem 1: "The SVG imports but the cut lines are jagged"
This usually means the SVG contains embedded raster data instead of true vector paths. Re-convert the image using a higher-quality trace mode, or simplify the paths in the converter settings.
Problem 2: "Design Space is slow or crashes with my SVG"
Your SVG has too many nodes. Use Super Vectorizer Pro's detail slider to reduce node count, or use an SVG optimizer like SVG Compressor Online to simplify paths after conversion.
Problem 3: "The SVG imports as a single flattened layer"
The original image didn't have distinct color regions for the converter to separate. Try increasing the "color sensitivity" setting during conversion, or manually separate elements in Design Space using the "Contour" tool.
Problem 4: "My cut lines have tiny gaps"
This indicates broken paths in the SVG. In Super Vectorizer Pro, use the "close paths" option during export. In Design Space, use the "Weld" tool to connect nearby cut lines.
Frequently Asked Questions
Can I use a JPG directly in Cricut Design Space without converting to SVG?
Yes, but with limitations. Design Space can import JPG/PNG files and use its built-in trace tool ("Simple," "Moderate," or "Complex" modes). However, the results are often less precise than a proper SVG conversion. For simple shapes and high-contrast images, Design Space's trace tool may be sufficient. For detailed designs, text-based images, or anything requiring clean cut lines, converting to SVG first produces far better results. The SVG converter gives you control over node count and path smoothness that Design Space's automatic trace cannot match.
What's the best free Cricut SVG converter?
For occasional use, SVGVector's free online PNG-to-SVG converter is a solid choice — it runs in your browser, requires no registration, and handles most common image formats. For more control, Inkscape (free desktop software) includes a "Trace Bitmap" feature that can produce Cricut-ready SVGs, though it has a steeper learning curve. Super Vectorizer Pro's free trial lets you preview results with professional-grade tracing algorithms before deciding whether to export. The "best" tool depends on how many conversions you do: once a month (free online), once a week (Inkscape), daily (Super Vectorizer Pro).
How do I convert a hand-drawn sketch to SVG for Cricut?
Start by photographing or scanning your sketch at the highest resolution possible (300 DPI minimum). Clean up the image in any photo editor (increase contrast so the lines are dark and the background is white). Then use a Cricut SVG converter in "Line Art" or "Black & White" mode. Super Vectorizer Pro's line art mode is specifically designed for this workflow — it preserves the character of hand-drawn lines while converting them to smooth vector paths. After conversion, import the SVG into Design Space and use the "Weld" tool if you need connected cut lines.
Why does my SVG look different in Cricut Design Space than in the converter preview?
Design Space renders SVGs differently than most converters. Common causes: (1) The SVG uses fonts that aren't embedded — Design Space substitutes a default font. (2) The SVG contains effects (shadows, gradients) that Design Space flattens. (3) The SVG has very thin strokes (<0.5px) that Design Space interprets differently. To fix: convert all text to paths before exporting, avoid complex gradients (use solid colors for cut files), and ensure stroke widths are at least 1px or converted to fills.
Convert Your Images for Cricut Today
Super Vectorizer Pro gives you full control over node count, path quality, and output format — everything you need to make perfect Cricut SVG files. Try the free trial and preview your results.
Compatible with macOS 10.10+ (M1/M2/M3) & Windows 7/8/10/11
Related Articles
Try These Free Online Tools
No download required — convert, compress & optimize SVGs right in your browser
PNG to SVG Converter
Convert PNG, JPG, BMP images to scalable vector graphics instantly
PNG to SVG ConverterSVG Compressor (Mini)
Reduce SVG file size by up to 80% without losing quality
SVG Compressor OnlineSVG Optimizer
Clean up SVG code, remove redundant data and optimize for web
SVG Optimizer OnlineJPG to SVG Converter
Turn JPEG photos into crisp vector artwork in seconds
JPG to SVG ConverterEPS to SVG Converter
Convert EPS vector files to web-friendly SVG format
EPS to SVG ConverterAll Free Tools
Browse our complete collection of free online conversion tools
Browse All Free Tools