
Every business needs a logo that looks sharp everywhere—from business cards to billboards. But if your logo is stuck in a raster format like PNG, JPG, or GIF, it will blur and pixelate the moment you scale it up. To convert logo to vector is to future-proof your brand identity. In this comprehensive guide, we'll walk you through everything you need to know: why vector format matters, the different methods available, step-by-step tutorials for both desktop software and online tools, and how to choose the best approach for your specific situation.
Whether you're a small business owner with a pixelated logo file, a graphic designer preparing client assets, or a marketer who needs scalable graphics for print and web, this guide covers professional vectorization techniques that deliver clean, accurate results. We'll explore Super Vectorizer Pro for desktop users who need precision and control, free online converters for quick tasks, and manual tracing techniques for complex artwork that requires a human touch.
Ready to convert your logo to vector format? Try Super Vectorizer Pro free trial to preview vectorization results.
Compatible with macOS 10.10+ (M1/M2/M3) & Windows 7/8/10/11
Why You Need to Convert Your Logo to Vector Format
Before diving into the "how," let's understand the "why." Vector graphics and raster graphics are fundamentally different technologies, and this difference matters enormously for logo design.
The Fundamental Difference: Vectors vs. Raster
Raster images (PNG, JPG, GIF, BMP, WebP) are made of pixels—tiny squares of color. When you zoom in or print at large sizes, these pixels become visible, creating a blurry or "pixelated" appearance. A PNG logo that looks crisp at 200×200 pixels might look terrible when printed on a 3-meter-wide banner.
Vector graphics (SVG, AI, EPS, PDF with vector data) use mathematical equations to define shapes, lines, and curves. Because they're math-based rather than pixel-based, vectors can scale to any size—from a favicon to a building wrap—without any loss of quality. The logo remains perfectly crisp at every dimension.
| Feature | Raster Logo (PNG/JPG) | Vector Logo (SVG/AI) |
|---|---|---|
| Scalability | Limited—pixelates when enlarged | Infinite—crisp at any size ✓ |
| File size | Larger for complex images | Usually smaller for logos |
| Editability | Difficult—pixels are "flat" | Easy—each element is separate ✓ |
| Print quality | Requires 300 DPI at target size | Always print-ready ✓ |
| Web performance | Good for photos | Excellent for logos (SVG) ✓ |
If your logo currently exists only as a PNG or JPG, converting it to vector isn't just a "nice to have"—it's essential for professional brand presentation. Printers will thank you, your website will load faster, and your brand will look consistently sharp across all media.
Method 1: Desktop Software for Professional Logo Vectorization
For businesses and designers who need reliable, high-quality results, desktop software is the gold standard. These applications run locally on your computer, providing faster processing, better privacy, and more control over the vectorization process.
Super Vectorizer Pro (Mac & Windows)
Super Vectorizer Pro is purpose-built for converting images to vector format. Unlike general-purpose design tools, it focuses exclusively on the math of vectorization—and it shows in the results.
Key advantages for logo conversion:
- Intelligent path detection: The algorithm identifies sharp edges, smooth curves, and corners automatically, producing clean vector paths that match the original artwork.
- Color quantization: Logos often use flat colors or simple gradients. Super Vectorizer Pro can reduce these to a clean vector palette, avoiding the muddy multi-color fills that plague inferior converters.
- Adjustable detail levels: You control how aggressively the software simplifies paths. For a clean corporate logo, you might want fewer nodes. For a detailed illustrative logo, you can preserve more detail.
- Batch processing: If you have multiple logo variations (color, black-and-white, reversed), you can process them all at once.
- Multiple export formats: Save as SVG, PDF, AI, EPS, or DXF depending on your needs.
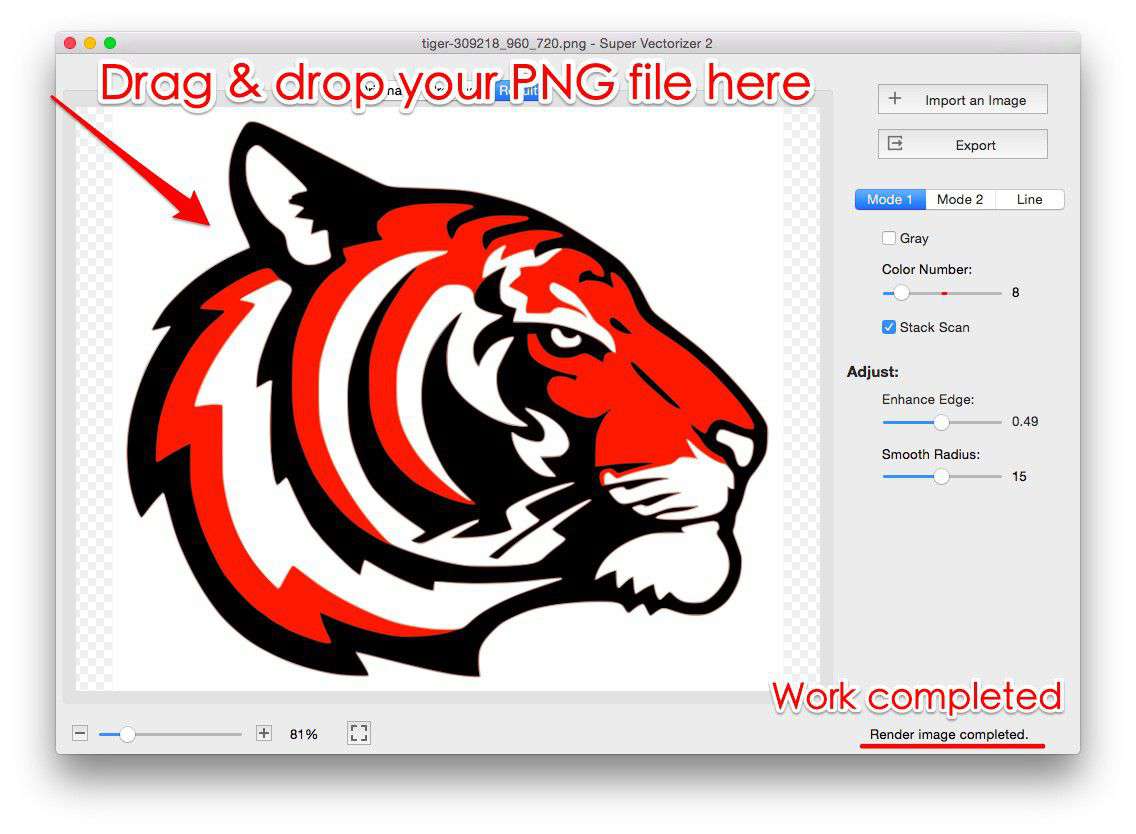
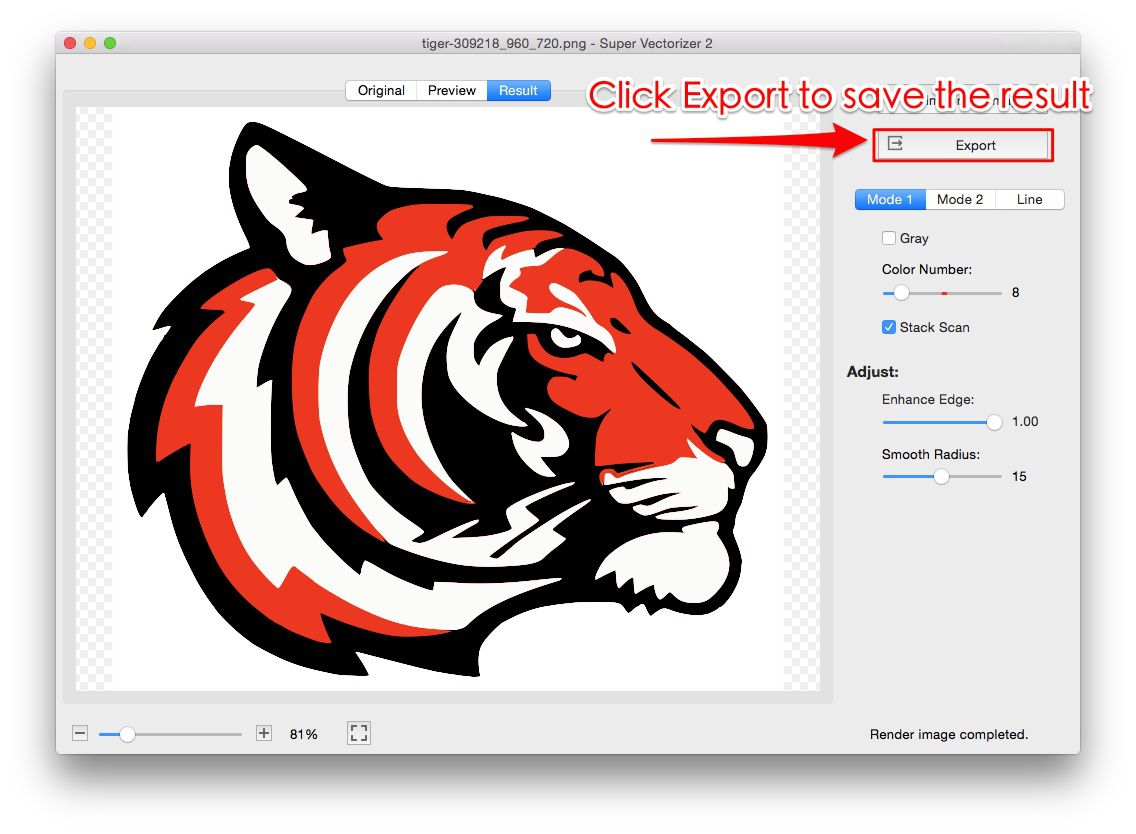
Step-by-step: Converting a logo with Super Vectorizer Pro
- Prepare your source file. Start with the highest-resolution PNG or JPG you have. A 2000×2000 pixel logo will vectorize more accurately than a 200×200 pixel version.
- Open the software and import. Drag your logo file into the Super Vectorizer Pro window, or use File → Open.
- Adjust vectorization settings. The software provides sliders for "Detail," "Noise Removal," and "Corner Threshold." For most logos, the default "Auto" mode produces excellent results. For very simple logos (text-only or basic shapes), increase the "Simplify" setting to reduce unnecessary nodes.
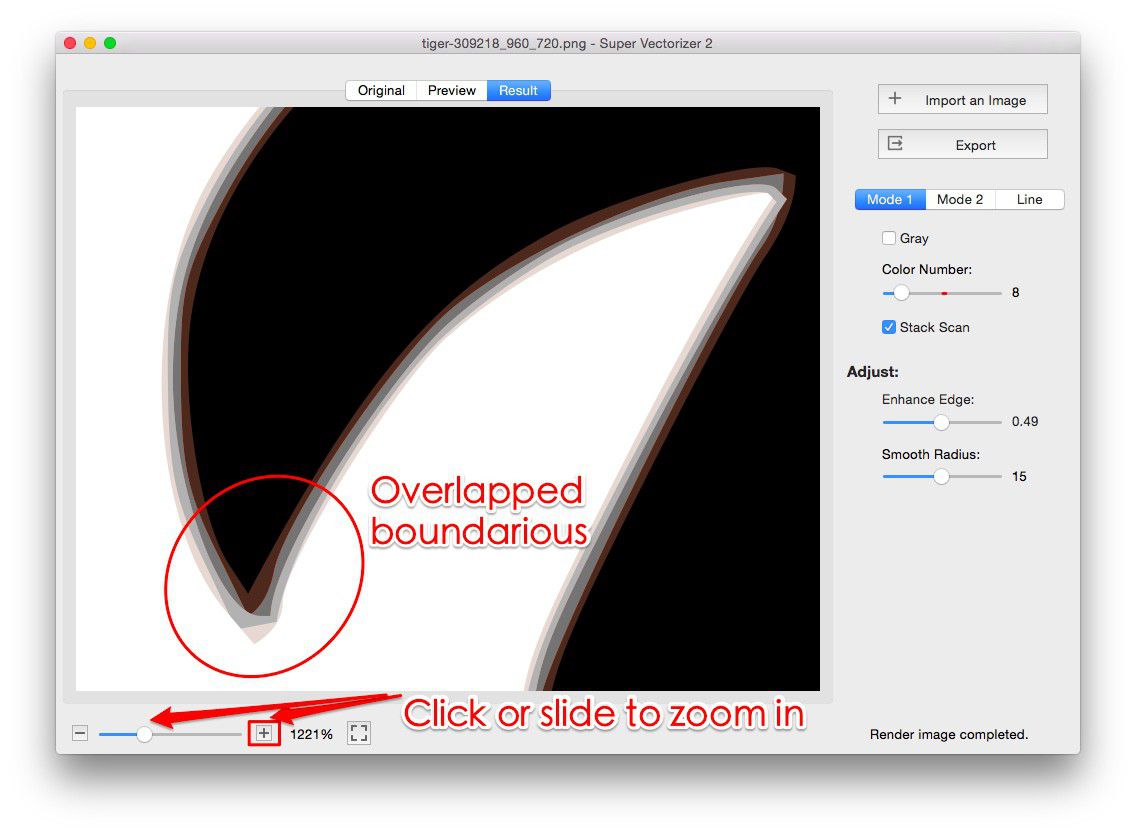
- Preview the result. The software shows a real-time preview of the vector paths over your original image. Zoom in to 400% or more to inspect critical areas like text, sharp corners, and fine details.
- Refine if needed. If certain areas look too simplified or too detailed, adjust the sliders and re-vectorize. This iterative process is the key to professional results.
- Export. Choose SVG for web use, PDF for print, or AI/EPS for compatibility with Adobe Illustrator and other design tools.
Adobe Illustrator (Industry Standard, Subscription)
Adobe Illustrator is the industry-standard vector graphics editor. Its "Image Trace" feature can convert logos to vectors, but it requires a monthly subscription and has a steeper learning curve than dedicated tools like Super Vectorizer Pro.
When to choose Illustrator: If you already have a Creative Cloud subscription and need to do extensive manual editing of the vectorized logo (tweaking individual paths, adjusting curves, adding effects), Illustrator is the right choice. For straightforward logo-to-vector conversion, it's often overkill.
Method 2: Online Logo to Vector Converters (Free & Quick)
Not everyone needs (or wants) to install desktop software. Online converters are convenient, free, and work in any browser. However, they come with trade-offs that are important to understand.
Best Free Online Logo Converters
| Tool | Best For | File Size Limit | Output Quality |
|---|---|---|---|
| SVGVector Online | Quick PNG/JPG to SVG | 10 MB | Good Free |
| Vectorizer.ai | AI-enhanced tracing | 15 MB | Excellent |
| Adobe Express (Free) | Basic conversions | 5 MB | Moderate |
| Convertio | Batch conversion | 100 MB | Basic |
Advantages of online converters:
- No installation required—works on any device with a browser
- Usually free for basic use
- Good for one-off conversions where absolute precision isn't critical
Disadvantages to consider:
- Privacy concerns: You're uploading your logo to a third-party server. For unreleased brand assets, this can be a problem.
- Limited control: Most online tools offer minimal adjustment options. You get what you get.
- File size limits: Free tiers typically cap uploads at 5-15 MB.
- Internet required: No connection means no conversion.
- Queue times: During peak usage, processing can be slow.
Desktop Software vs. Online Tools: Our Verdict
Choosing between desktop software and online converters depends on your specific needs, frequency of use, and quality requirements.
Desktop Software (Recommended for Business Use)
- Full control over vectorization parameters
- Works offline—no internet required
- Better privacy—files stay on your computer
- Higher output quality for detailed logos
- Batch processing for multiple logo variants
- One-time purchase (Super Vectorizer Pro) vs. subscription
Online Converters (Good for Occasional Use)
- No installation or learning curve
- Free for basic conversions
- Works on any operating system
- Good enough for simple, low-detail logos
- No local storage requirements
Method 3: Manual Vector Tracing (The "Gold Standard")
For logos with very complex details, unusual shapes, or artistic elements that automated tools struggle with, manual tracing in vector software is the best approach. This gives you complete control but requires significant time and skill.
When to Manually Trace Your Logo
- The logo has hand-drawn elements or artistic flourishes
- Automated tools produce messy or inaccurate paths
- You need to separate elements onto different layers for animation or print effects
- The logo uses very specific custom fonts that need to be preserved exactly
- You're rebranding and want to "clean up" the logo as you vectorize it
Basic Manual Tracing Workflow
- Import the raster logo as a locked background layer in Illustrator or Inkscape.
- Create a new vector layer on top of the reference image.
- Use the Pen tool to trace the outer edges of the logo. For curved elements, place fewer points and let the software create smooth curves between them.
- Trace internal details—text, icons, decorative elements—on separate sub-layers.
- Apply colors using the original logo as a reference. Use global colors if your design software supports them.
- Simplify paths by removing unnecessary anchor points while maintaining the shape's accuracy.
- Expand strokes to fills if needed, and unite overlapping shapes.
- Export as SVG, AI, or EPS.
Manual tracing typically takes 1-4 hours depending on logo complexity. For most business logos, however, a high-quality automated tool like Super Vectorizer Pro will achieve 95% of the quality in 2 minutes instead of 2 hours.
Common Logo Vectorization Problems (and How to Fix Them)
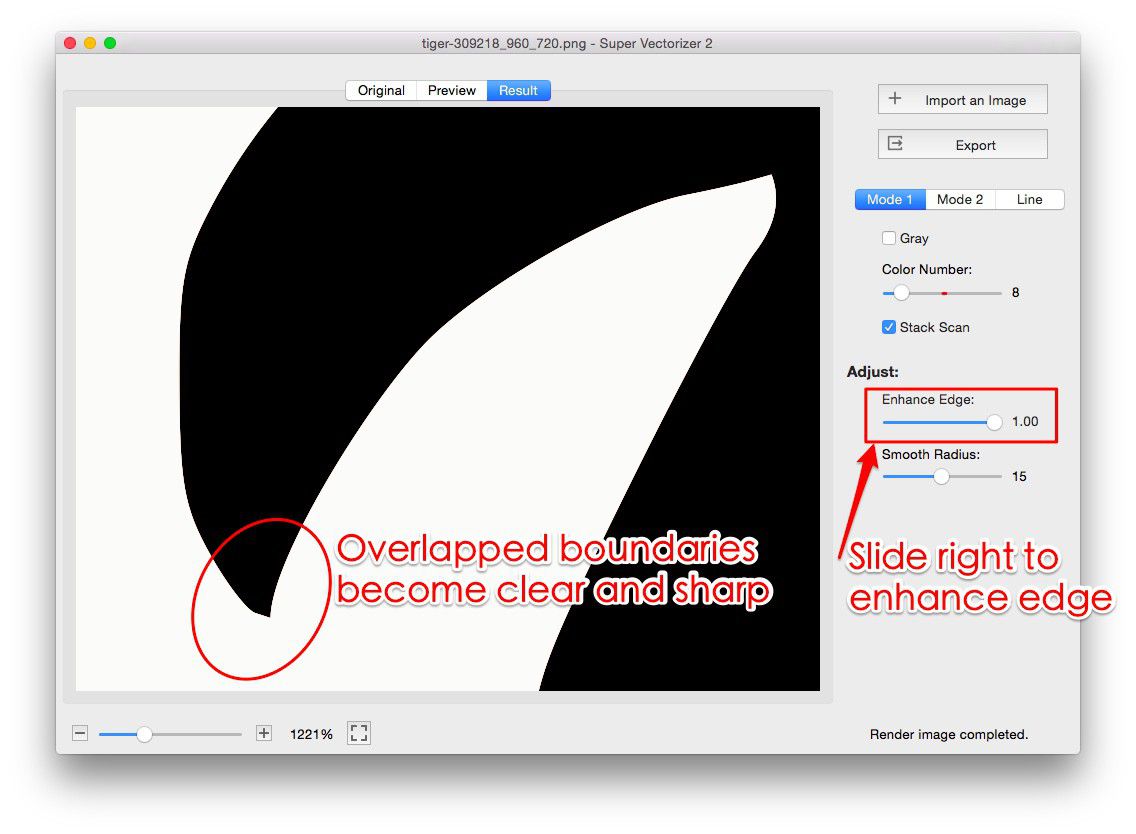
Problem 1: Jagged or "Staircase" Edges
Cause: The source image has too few pixels, or the vectorization setting was too "detailed," creating jagged paths.
Fix: Increase the "Smoothing" or "Simplify" setting in your vectorization software. If using manual tracing, use fewer anchor points and let the software's curve algorithm create smooth transitions.
Problem 2: Too Many Nodes (Bloated File Size)
Cause: Overly aggressive detail preservation during vectorization.
Fix: Increase the "Simplify" or "Node Reduction" setting. A simple logo should have fewer than 50 nodes; a complex one might have 200-500. If your SVG has thousands of nodes, it's been over-vectorized.
Problem 3: Colors Look Wrong or "Muddy"
Cause: The vectorization algorithm created too many color gradients instead of flat fills.
Fix: Adjust the "Color Count" or "Palette Size" setting. For logo work, you typically want 2-8 flat colors, not a continuous gradient. Super Vectorizer Pro's "Limit Colors" feature is specifically designed for this scenario.
Problem 4: Thin Lines or Small Text Disappears
Cause: The vectorization process simplified away fine details.
Fix: Reduce the "Simplify" setting and increase "Detail." Alternatively, manually redraw very thin elements after vectorization—they're often easier to recreate from scratch than to auto-trace accurately.
Best Practices for Logo Vectorization
- Start with the highest-resolution source file available. Even the best vectorization can't invent detail that isn't in the original. If you only have a 200×200 pixel PNG, try to find the original source file before vectorizing.
- Use SVG as your primary output format. SVG is widely supported on the web, can be embedded directly in HTML, and preserves all vector information. For print, also export PDF or AI.
- Simplify wisely. A good vector logo has the minimum number of nodes needed to accurately represent the shape. Over-vectorized logos look messy and load slowly on websites.
- Keep text as text when possible. If your logo contains text and you have the font, consider recreating the text in vector software rather than tracing it. This ensures the text remains editable.
- Test at multiple sizes. After vectorizing, view your logo at favicon size (16×16), standard web size (200-400px wide), and large print size (3000px+ equivalent). It should look good at all of them.
- Save the source. Always keep your original raster file and the vector source file (AI, EPS, or editable SVG). You'll need them when the logo needs modification in the future.
Frequently Asked Questions
Can I convert a logo to vector for free?
Yes, several free online tools can convert basic logos from PNG or JPG to SVG format. However, free tools often lack the fine control needed for professional results. For business use, a dedicated desktop tool like Super Vectorizer Pro (which offers a free trial to preview results) typically produces cleaner, more accurate vectors. The free trial lets you inspect the quality before committing to purchase.
What format should I use for my vector logo?
For web use, SVG is the best choice—it's supported by all modern browsers, loads quickly, and scales perfectly. For print, PDF or AI (Adobe Illustrator) format is preferred. For compatibility with signage and cutting machines (Cricut, Silhouette), SVG or EPS works well. It's a good idea to save your logo in all three formats.
My logo has a transparent background—will that be preserved?
Yes, if you use the right settings. When vectorizing a PNG with transparent background, make sure your software is set to "preserve transparency" or "remove background." SVG and PDF formats both support transparency. If your converted logo has a white background, re-Vectorize with the background removal option enabled.
How do I know if my logo is already a vector?
Check the file extension: AI, EPS, SVG, and PDF (sometimes) are vector formats. To be sure, open the file in a vector editor like Illustrator or Inkscape. If you can select individual elements and scale them infinitely without quality loss, it's a vector. If it's a flat image that pixelates when zoomed, it's a raster file pretending to be a vector.
Can I vectorize a logo on my phone or iPad?
There are mobile apps that can vectorize images (like Adobe Capture or Vectornator), but for professional logo work, a desktop or laptop computer is strongly recommended. The precision needed for brand-ready vector logos is difficult to achieve on a touchscreen. If you must use a mobile device, opt for a high-quality online converter and review the results carefully on a large screen afterward.
Convert Your Logo to Vector Today
Download Super Vectorizer Pro free trial to preview your vectorized logo. See the quality for yourself with full preview access—export requires the full version.
Compatible with macOS 10.10+ (M1/M2/M3) & Windows 7/8/10/11
Related Articles
Try These Free Online Tools
No download required — convert, compress & optimize SVGs right in your browser
PNG to SVG Converter
Convert PNG, JPG, BMP images to scalable vector graphics instantly
Try free →SVG Compressor (Mini)
Reduce SVG file size by up to 80% without losing quality
Try free →All Free Tools
Browse our complete collection of free online conversion tools
Browse all →