
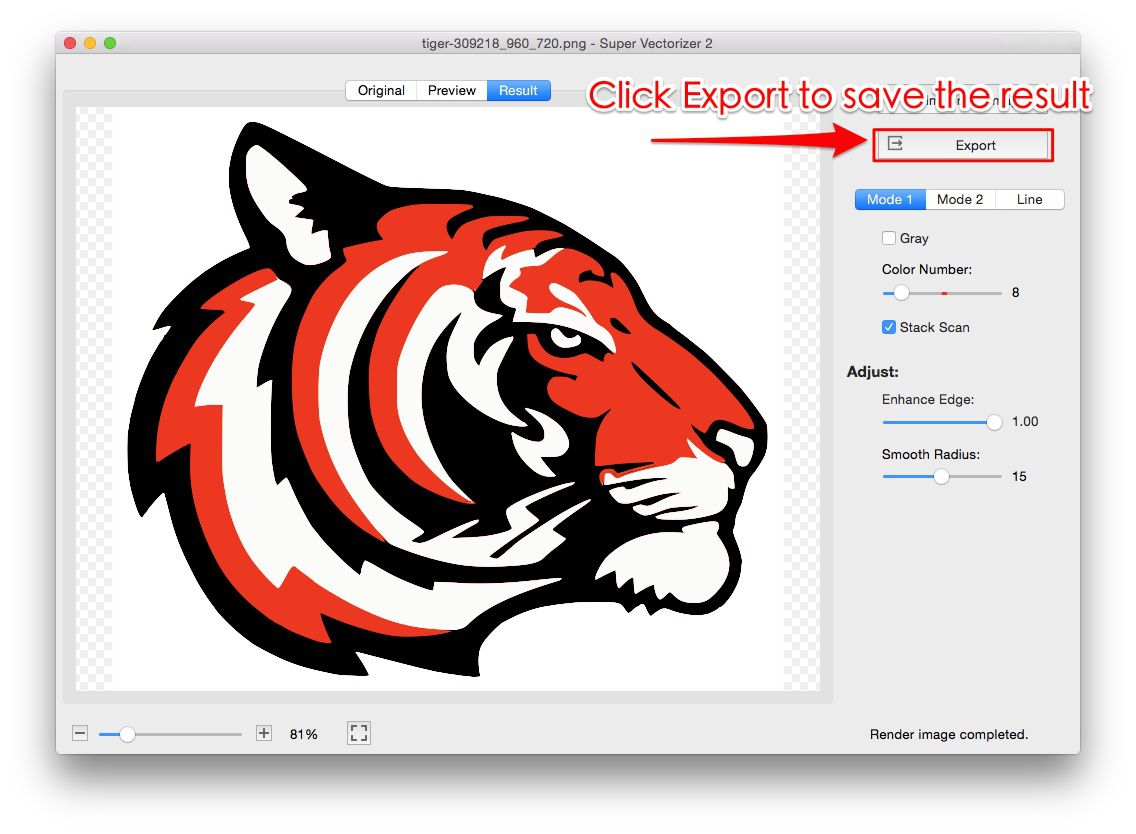
Stickers are the gateway craft for most cutting-machine owners — and they all start with the same file type. SVG for stickers is the gold-standard format because it stores your design as editable vector paths, so the cutter follows exact lines instead of guessing at pixels. Whether you’re making a die-cut decal, a kiss-cut planner sticker, or a full-color print-then-cut sheet, a well-built SVG is the difference between a clean peel and a weeding nightmare. In this guide we’ll cover the sticker styles, the SVG rules that make them cut cleanly, and how a desktop app like Super Vectorizer Pro helps you turn raster art into cut-ready vectors.
Ready to turn your artwork into cut-ready sticker SVGs? Try Super Vectorizer Pro free trial to preview vectorization results.
Compatible with macOS 10.10+ (M1/M2/M3) & Windows 7/8/10/11
Why SVG Is the Right Format for Stickers
A sticker design lives or dies by its cut line. A PNG or JPG is just a grid of pixels, so a cutter has to trace it and often gets the edges wrong. An SVG is already a set of vector paths — the machine simply follows them. That means:
- Sharp cuts at any size — scale from a 1-inch laptop decal to a bumper sticker with zero quality loss.
- Editable layers — recolor, separate, or delete parts of the design without starting over.
- Clean weeding — well-constructed paths have no stray specks for you to pick out later.
- Small files — for simple shapes, SVG is usually far lighter than a high-res PNG.
Sticker Styles & the SVG Each One Needs
Before you build the file, decide which sticker you’re making. The style dictates how your SVG should be structured:
| Sticker style | What it is | SVG requirement | Best for |
|---|---|---|---|
| Die-cut | Cuts the shape of the design itself | Single outline path = cut contour | Logos, mascots, decals |
| Kiss-cut | Cuts shape but leaves backing paper | Outline path + optional border | Planner, laptop stickers |
| Print-then-cut | Full-color print, contour cut | Flattened image + offset outline Common | Photos, illustrated stickers |
| Layered vinyl | Separate colored vinyl sheets | One path per color layer | Text, simple icons |
How to Build Cut-Ready SVG for Stickers
Follow these steps whether you’re starting from scratch or converting existing art:
- Start with clean source art. If your logo or drawing is a PNG/JPG, vectorize it first so the cut line is a true path, not a traced bitmap.
- Make the cut line a single closed path. The contour should be one continuous outline with no gaps, or the machine will stop and restart.
- Keep internal detail as fills, not extra cut lines. Only the outer edge should be a cut; interior shapes are printed or layered.
- Add a small offset border for kiss-cut. A 1–3 mm offset around the design gives that classic sticker white border.
- For print-then-cut, flatten then add an outline. Merge the artwork into one layer, then draw the cut contour around it with the Offset tool.
- Ungroup and name layers. Label each color or part so the cutting software imports them logically.
Die-Cut vs Kiss-Cut vs Print-Then-Cut
These three dominate the sticker world, and each has a sweet spot:
- Die-cut follows your exact shape — great when the silhouette is the branding (a cat logo, a coffee cup). Looks premium, but wastes more vinyl around irregular shapes.
- Kiss-cut cuts the shape but leaves the backing, usually inside a square or rounded rectangle of vinyl. Cheaper to produce, easier to peel, ideal for selling sheets.
- Print-then-cut is the only way to get full-color, photographic, or gradient stickers. You print the art on a sticker sheet, then the machine contours around it. The SVG is a flattened image plus an outline — not a multi-layer cut file.
Layered Vinyl Stickers
If you’re cutting colored vinyl (HTV or adhesive) instead of printing, your SVG needs one path per color. Each layer is cut from a different sheet and stacked. Keep layers minimal — 2 to 4 colors weed and align far more easily than 8. Build the SVG so colors don’t overlap awkwardly, and consider a “knockout” (a shape removed from an upper layer) so lower colors show through cleanly.
Our Verdict: Make the SVG Yourself vs Use a Converter
Hand-built SVGs give maximum control, but converting existing raster art into a clean vector is where most people get stuck. A desktop vectorizer bridges that gap quickly.
Super Vectorizer Pro (Desktop) — Advantages
- Turns PNG/JPG art into editable vector paths offline
- Tunes each sticker individually for clean cut lines
- Clean contours that import as cut-ready lines
- Privacy: files never leave your computer
Draw It by Hand (Illustrator/Inkscape) — Advantages
- Total control over every anchor point
- Best for brand-new original artwork
- No conversion artifacts to clean up
Common Sticker SVG Mistakes
- Too many tiny cut paths. Intricate internal lines become a weeding nightmare. Keep interior detail as print, not cut.
- Open or overlapping contours. The cutter lifts and re-starts, leaving ragged edges. Close every cut path.
- Forgetting the offset. A kiss-cut with no border looks unfinished and is harder to peel.
- Uploading a PNG and calling it SVG. If the file is really a wrapped bitmap, the cut will be jagged. True vector tracing first.
- Overlapping layers in print-then-cut. Flatten the artwork before adding the contour, or the machine cuts internal lines too.
Conclusion
Great SVG for stickers comes down to one idea: give the cutter a clean, closed path to follow. Pick your style first — die-cut, kiss-cut, print-then-cut, or layered vinyl — then build the file so the cut line is a single contour and interior detail stays as fills or separate color layers. Start from vector source art whenever you can; when you only have a PNG or JPG, convert it to a true vector with a desktop tool like Super Vectorizer Pro before you cut. Do that, and your stickers will weed fast and cut sharp every time.
Material-Specific SVG Preparation
Different sticker materials require different SVG preparation. Vinyl cut stickers need the design in single-line vector paths with no overlapping shapes, as the cutter follows each path once. Printable vinyl allows for full-color designs with gradients and effects, but the cut contour must be a separate layer with a specific stroke color (typically magenta or red) at a known width.
Holographic and metallic vinyls interact with design colors in unexpected ways. Light colors may appear washed out, and dark colors can shift dramatically. Test small swatches of your palette on the actual material before finalizing the SVG. Many designers create a separate "material test" SVG with color swatches and cut a small sample to verify appearance under the intended lighting conditions.
For die-cut stickers, add a 2 to 3 mm white border around the entire design in the SVG. This border becomes the white edge of the sticker and prevents any background color from showing at the cut line. For kiss-cut stickers on a sheet, maintain at least 5 mm spacing between individual stickers to prevent the blade from cutting into adjacent designs during the kiss-cut pass.
Frequently Asked Questions
Can I use a PNG for stickers instead of an SVG?
You can, but it’s not ideal. Cutting software will trace the PNG, and the result is often a jagged or inaccurate edge. Converting the PNG to a true SVG vector first gives the machine an exact path to follow, so your stickers cut cleaner and scale without quality loss.
What’s the difference between die-cut and kiss-cut sticker SVGs?
A die-cut SVG’s outline is the shape of the design itself, so the cut follows the contour exactly. A kiss-cut SVG adds a border (usually a rounded rectangle or a small offset) around the shape, cuts that, and leaves the backing paper attached — which makes the sticker easier to peel and cheaper to produce in sheets.
How do I make a print-then-cut sticker SVG?
Design or import your full-color artwork, then flatten it into a single layer. Use your software’s Offset tool to draw a contour around the flattened art — that contour becomes the cut line. Upload the flattened image plus outline to Cricut Design Space or Silhouette Studio and choose the print-then-cut action.
My sticker SVG is hard to weed. What went wrong?
Usually it’s too many internal cut paths or very thin lines. Move interior detail into printed fills rather than cut lines, thicken delicate strokes, and make sure each cut path is a single closed contour. Simpler paths weed faster and cut more reliably on both Cricut and Silhouette machines.
Build Cut-Ready Sticker SVGs
Try Super Vectorizer Pro free trial to preview vectorization results, then turn your artwork into clean, editable sticker SVGs for Cricut and Silhouette.
Compatible with macOS 10.10+ (M1/M2/M3) & Windows 7/8/10/11
Related Articles
Try These Free Online Tools
No download required — convert, compress & optimize SVGs right in your browser
PNG to SVG Converter
Convert PNG, JPG, BMP images to scalable vector graphics instantly
PNG to SVG ConverterSVG Compressor (Mini)
Reduce SVG file size by up to 80% without losing quality
SVG Compressor OnlineSVG Optimizer
Clean up SVG code, remove redundant data and optimize for web
SVG Optimizer OnlineJPG to SVG Converter
Turn JPEG photos into crisp vector artwork in seconds
JPG to SVG ConverterEPS to SVG Converter
Convert EPS vector files to web-friendly SVG format
EPS to SVG ConverterAll Free Tools
Browse our complete collection of free online conversion tools
Browse All Free Tools