
If you have ever tried to put a JPG on a shirt, you already know the problem: it looks fine on screen and then prints pixelated, blurry, or with the wrong colours. That is why SVG for t-shirts is the standard everyone from Cricut crafters to commercial screen printers relies on. An SVG (Scalable Vector Graphic) describes your design as mathematically defined paths rather than a grid of pixels, so it stays razor-sharp whether you cut it at pocket size or print it across the chest of a 4XL tee. In this guide you will learn how to create t-shirt SVG files from scratch or from an existing image, how to prepare them for each decoration method, and where a desktop tool like Super Vectorizer Pro fits when you are starting from a photo or scan. You can try Super Vectorizer Pro with a free trial to preview vectorization results before you commit.
Ready to convert your images? Try Super Vectorizer Pro free trial to preview vectorization results.
Compatible with macOS 10.10+ (M1/M2/M3) & Windows 7/8/10/11
Our Verdict
T-shirt SVGs need clean paths, correct layering for cut or print, and compatibility with your cutter's software. The right tool saves hours of cleanup.
Best for Custom Designs: Super Vectorizer Pro
- Auto-traces logos and artwork into cut-ready SVG
- Full control over color layers and path smoothing
- Free trial to preview results
- Works offline on Mac and Windows
Best Free Alternative: Inkscape
- Free and open source
- Manual path editing for precise control
- Supports SVG, DXF, and PNG export
- Steeper learning curve
Desktop App vs Free Online Tools for T-Shirt SVGs
Both can produce a usable SVG — the difference is how much control you have over colour separation, path cleanup, and multi-layer output.
Super Vectorizer Pro (Desktop)
- Full control over colour count and path detail for clean cuts
- Handles photos, scans, and multi-colour designs
- Export to SVG, PDF, DXF — ready for any cutter or printer
- Per-design tuning for crisp printable artwork
- Works offline — no upload, no queue, no file-size limit
Free Online SVG Tools
- No install — convert right in the browser
- Great for simple, single-colour logos and text
- Usually free with no signup
- Convenient on a phone or tablet
- Limited colour handling and no batch mode
Why SVG Is the Right Format for T-Shirts
A raster image (PNG, JPG) is a snapshot of pixels at one resolution. Scale it up to fill a shirt and the edges soften, the colours muddy, and fine details vanish. An SVG for tshirt production stores your artwork as paths — lines, curves, and fills defined by coordinates — so it scales from a onesie pocket logo to a full-back poster without ever losing a single pixel of sharpness, because there are no pixels to lose.
That scalability matters for every decoration method. A heat transfer vinyl cutter reads the SVG paths to know where to cut; a screen printer separates the SVG colours into individual screens; a sublimation printer rasterizes the SVG at whatever DPI the fabric needs; and print-on-demand platforms like Printful and Printify accept SVG uploads alongside PNG. One file, every method. For a deeper look at why vectors beat raster for this kind of work, see our guide on SVG vs PNG and when to use each.
T-Shirt Decoration Methods and What Each Needs from an SVG
Not every t-shirt SVG is built the same way. The decoration method you choose determines how you should structure the file:
- Heat Transfer Vinyl (HTV): the cutter follows SVG paths to cut coloured vinyl sheets. Each colour needs its own SVG layer, and small interior shapes must be arranged so you can weed (peel away) the negative space. Think of it like a sticker — solid shapes, no gradients.
- Screen Printing: each ink colour becomes a separate screen, so the SVG must use spot colours, not RGB blends. Simpler paths with clean boundaries produce crisper prints.
- Sublimation: the design is printed onto transfer paper and pressed into polyester fabric. Full-colour, photographic SVGs work here, but the file still needs to be high-resolution vector art for the printer to rasterize cleanly.
- Direct-to-Garment (DTG) / Print-on-Demand: the printer sprays ink directly onto the fabric. A transparent-background SVG (or a high-res PNG exported from one) is ideal. POD platforms often prefer PNG at 300 DPI, but starting from SVG means you can export at any size.
| Method | SVG Structure Needed | Colour Handling | Best For |
|---|---|---|---|
| HTV Cutting | Layered, solid-fill paths | One colour per layer | Text & logos |
| Screen Printing | Spot-colour separated | 1–6 spot colours | Bulk runs, bold graphics |
| Sublimation | Full-colour vector | CMYK / photographic | Polyester tees |
| DTG / POD | Transparent BG, high-res | Full colour | One-offs, photos |
How to Create an SVG for a T-Shirt
There are three common starting points, and the best one depends on what you already have:
Option A: Draw It from Scratch in a Vector Editor
If you are designing a new graphic, work directly in Illustrator, Inkscape, or Affinity Designer. Use the pen tool to build paths, assign fills, and organize each colour onto its own layer. This gives you the cleanest possible SVG because every path is intentional. Export as SVG 1.1 with the “outline” option if your cutter needs stroke paths, or keep fills for print.
Option B: Convert an Existing Image to SVG
Most crafters start here. You have a logo, a sketch, or a piece of clipart as a PNG or JPG, and you need it as a cuttable SVG. This is vector tracing — the process of reading the shapes in a raster image and rebuilding them as vector paths. A free online tool can handle simple, high-contrast images, but anything with multiple colours, gradients, or fine detail calls for a desktop converter. For the full workflow, see our guide on how to create an SVG from an image.
Option C: Trace a Photo or Scan with Super Vectorizer Pro
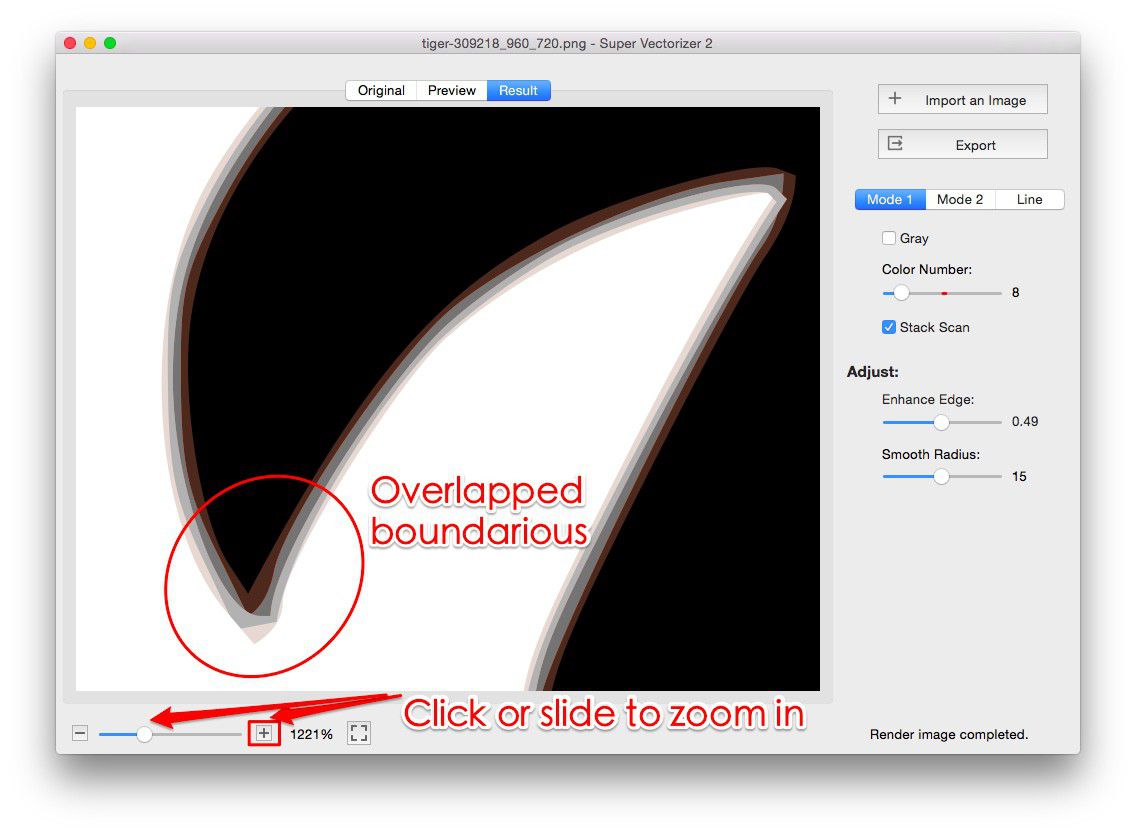
When your source is a photograph or a scanned drawing, Super Vectorizer Pro is built for exactly this. Drag the image into the app and the tracing engine separates colours and rebuilds each region as smooth Bézier paths. You control the colour count — set it to 2 for a two-colour HTV design, or push it higher for a sublimation print — and the detail level so bold shapes stay bold while fine lines survive. The result is a clean SVG you can open in any cutter software or print pipeline. Try Super Vectorizer Pro with a free trial to preview how your design will look as a vector before you commit.
Preparing Your SVG for HTV Cutting
Heat-transfer vinyl is the most popular method for home crafters, and it has the strictest SVG requirements. Follow these steps to get a file that cuts and weeds cleanly:
- Reduce to solid colours: gradients and photographs will not work — each colour must be a flat fill. Set the colour count in your tracer to match the number of vinyl sheets you plan to layer.
- Separate colours into layers: in your vector editor, move each colour group to its own named layer. Most cutter software reads SVG layers and lets you assign one to each mat.
- Weld overlapping text: if your design has text, use a weld or unite operation so intersecting letters merge into one continuous path. Otherwise the cutter will slice through overlapping strokes and produce fragments.
- Mirror the design: HTV is applied face-down, so flip the SVG horizontally before cutting. Most cutter apps handle this, but doing it in the SVG ensures consistency.
- Add a cut outline: for designs with interior negative space, add a thin outline path around the whole shape so the cutter creates a clean border for weeding.
For Cricut users specifically, import the SVG into Design Space, select each colour layer, and click “Attach” so it cuts in the correct position. Silhouette Studio Designer Edition and above imports SVG directly; the free Basic Edition needs DXF, which Super Vectorizer Pro can also export. See our Cricut SVG converter guide for the full Design Space workflow.
Preparing Your SVG for Screen Printing and Sublimation
Screen printing wants fewer colours — every colour is another screen, another setup, another cost. Aim for 1–4 spot colours and keep each on its own layer so your printer can output separate films. Convert any text to outlines so font substitution does not change the artwork.
Sublimation is the opposite: it thrives on full-colour, photographic detail. Your SVG can contain dozens of colours and gradients, and the sublimation printer will rasterize it at high DPI before pressing. The key is to start from a high-quality source image — at least 300 DPI at the final print size — so the tracer has enough data to build smooth paths. Super Vectorizer Pro handles multi-colour photos well; set the colour count high and the detail to a level that preserves shading without creating thousands of tiny path fragments. For related tips on preparing artwork for fabric, see our guide on SVG for sublimation printing.
Common SVG Problems (and How to Fix Them)
- The cutter slices through letters: overlapping strokes create duplicate paths. Weld or unite overlapping shapes in your vector editor before exporting.
- Colours bleed into each other: the SVG has too many colour layers for HTV. Reduce the colour count in your tracer and re-export with cleaner boundaries.
- Tiny fragments and specks: low-contrast source images produce noise. Increase the noise-removal setting, or start from a higher-contrast original.
- The design is too small to weed: thin lines under 1 mm are nearly impossible to weed from vinyl. Thicken strokes or simplify the design for HTV; reserve fine detail for sublimation or DTG.
- POD platform rejects the file: some platforms want PNG, not SVG. Export a 300 DPI transparent PNG from your SVG at the final print dimensions — starting from vector means you can export at any size without quality loss.
Frequently Asked Questions
What size should an SVG be for a t-shirt?
An SVG has no fixed pixel dimensions — it is resolution-independent, which is the whole point. For a standard adult chest logo, design at roughly 3.5–4 inches wide; for a full-back print, 10–12 inches wide. Because the SVG scales mathematically, you set the physical size in your cutter or print software, not in the file itself. Always confirm the final dimensions in your production software before cutting or printing.
Can I use a PNG instead of an SVG for t-shirts?
For print-on-demand and sublimation, a high-resolution PNG (300 DPI at print size) works fine. For HTV cutting and screen printing, you need vector paths — a PNG cannot tell a cutter where to cut or separate colours into screens. If you only have a PNG, convert it to SVG first using a tracer like Super Vectorizer Pro. See our SVG vs PNG guide for a full comparison.
How many colours should my t-shirt SVG have?
For HTV, keep it to 1–4 colours — each colour is a separate vinyl layer you cut, weed, and press. For screen printing, 1–6 spot colours is typical; more colours mean more screens and higher cost. For sublimation and DTG, you can use full colour with no practical limit. When tracing a photo to SVG, set the colour count in your converter to match the method you plan to use.
Do I need Super Vectorizer Pro to make t-shirt SVGs?
Only if you are starting from a photo, scan, or raster image. If you draw directly in a vector editor, you already have vector paths. If you have a PNG or JPG design, a free online tool can convert simple graphics, but multi-colour photos and detailed artwork call for a desktop tracer. Super Vectorizer Pro gives you colour-count control, smoothing, and precise export control — try the free trial to preview the result on your own design first.
Make Your Next T-Shirt SVG Today
Turn any photo, logo, or sketch into a clean, scalable SVG ready for cutting, printing, or print-on-demand. Try Super Vectorizer Pro free trial to preview vectorization results.
Compatible with macOS 10.10+ (M1/M2/M3) & Windows 7/8/10/11
Related Articles
Try These Free Online Tools
No download required — convert, compress & optimize SVGs right in your browser
PNG to SVG Converter
Convert PNG, JPG, BMP images to scalable vector graphics instantly
PNG to SVG ConverterSVG Compressor (Mini)
Reduce SVG file size by up to 80% without losing quality
SVG Compressor OnlineSVG Optimizer
Clean up SVG code, remove redundant data and optimize for web
SVG Optimizer OnlineJPG to SVG Converter
Turn JPEG photos into crisp vector artwork in seconds
JPG to SVG ConverterEPS to SVG Converter
Convert EPS vector files to web-friendly SVG format
EPS to SVG ConverterAll Free Tools
Browse our complete collection of free online conversion tools
Browse All Free Tools